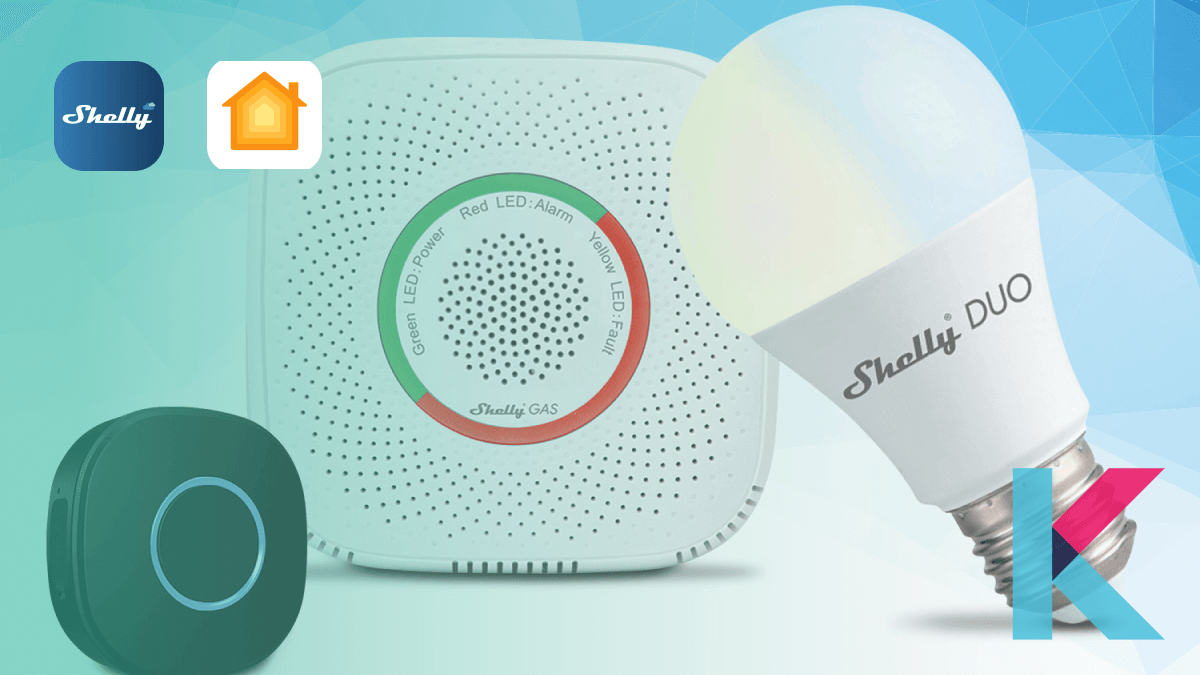
How to add Shelly devices to Apple HomeKit?
Have you ever wondered why your Shelly smart home devices don't show up in the Home App on your iPhone? Do you want to control them using Siri? Then here are the top methods to add Shelly devices to Apple HomeKit.
There’re two main ways to integrate Shelly devices with Apple HomeKit. Let's see simple ways to integrate Apple HomeKit Shelly.
- Enomek [Editor's pick]
- Athom HomeKit Bridge [Affordable solution]
- AddToHomeKit
- App Method
- Device Method
01. App Method
Enomek [Recommended Solution]
Enomek is the best solution to add your devices smart home devices and it is our recommended solution for you. Enjoy easy integration with Apple HomeKit in just a few taps with Enomek - HomeKit Enabler. Enomek is the best solution to add any smart home devices to Apple HomeKit.
Want to control all your smart home devices in one place, without switching between different apps.? Download your HomeKit enabler via the button below.
Step guide for Enomek App Installation
AddToHomeKit - Easiest Solution
AddToHomeKit is the easiest way to integrate your non-HomeKit devices to Apple HomeKit. You just want to follow the easy steps to control your Shelly Devices with Apple Home App and Siri voice. Find your easiest solution via the button below.
Homebridge
Are you about to integrate with smart home devices that don’t support HomeKit? Homebridge is the best solution for that. Simply, it is a lightweight NodeJS server. Also, it works as a bridge between HomeKit and non-HomeKit-compatible devices.
Install Homebridge on your PC
As the best solution to add your devices to HomeKit, installing Homebridge on your computer (macOS, Windows 10, Linux, and Docker) makes it easy for you with your computer running 24/7. If you are an expert in coding, you can do it yourself.
Check out how to add Shelly devices to Apple HomeKit using Homebridge.
Open Source HomeKit Firmware (monogoose-os)
There's a Open Source Apple HomeKit Firmware for Shelly Devices. Mongoose os shelly firmware exposes Shelly 1, Shelly 1PM, Shelly Plug S, Shelly 2 and Shelly 2.5 as Apple HomeKit accessories. Let's find out more about Shelly HomeKit Firmware.
02. Device Method
There’re several devices to add your Shelly Siri devices to HomeKit. Let’s look at two main device methods and which one is our recommendation.
Athom HomeKit Hub [Affordable solution]
The ATHOM HomeKit Homebridge Hub is the easiest and most affordable way to add your non-HomeKit devices to HomeKit. It is pre-flashed and specially compiled to work seamlessly with Apple HomeKit. You can finally control all of your smart home devices from one place, using the Apple Home app with the ATHOM HomeKit Homebridge Hub.
Benefits of using the ATHOM HomeKit Homebridge Hub:
- Seamless integration with Apple HomeKit
- Easy to set up
- Affordable Solution
Order your ATHOM HomeKit Homebridge Hub today and start enjoying the convenience of a truly connected home!
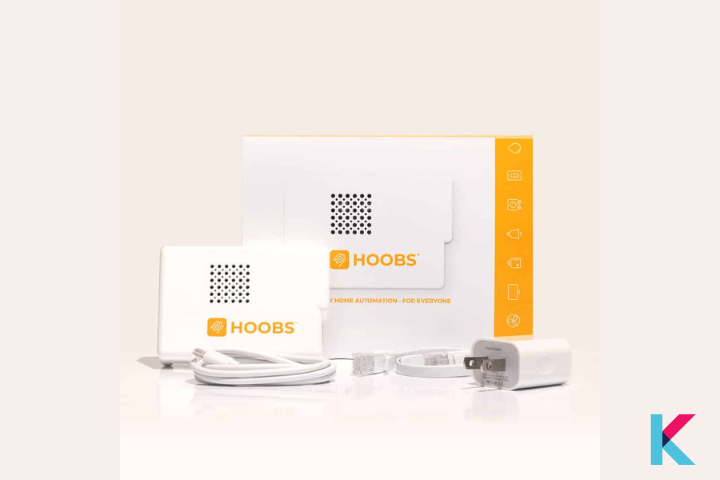
HOOBS solution
HOOBS is one of the hardware solutions to add Shelly devices to HomeKit. It makes your smart devices compatible with Apple HomeKit as Homebridge. If you want to get user-friendly home automation, HOOBS is the best solution for you.
Raspberry Pi
Raspberry Pi is the cheapest way to add your Shelly devices to Apple HomeKit. It is a compact and single board computer. Are you ready to use Raspberry Pi as the solution to add your devices to HomeKit? Then, you should have a 4GB microSD apart from the Pi.
If you’re keen to go with this Raspberry Pi solution, you need to have some coding experience. Otherwise, you can select our recommended app solution to add your any smart home devices to Apple HomeKit.
We have given three ways to solve your problem and hope this will help you to select the best method. Want to find more about Smarter Home Shelly HomeKit? Let's find out how to add Shelly devices to Apple Homekit using Homebridge solution further.
Shelly and HomeKit compatibility
When we talk about the Shelly HomeKit compatibility, the truth is that the two aren’t natively compatible with each other. But that is not the end of the story! While Shelly doesn’t offer native integration with Apple HomeKit, there are ways to add these smart devices to Apple HomeKit with simple third-party software applications and gadgets.
Not only Shelly Smart home devices, you can find any Smart home device compatibility like Roborock HomeKit compatibility. Let’s see how to connect Shelly to HomeKit with Shelly HomeKit Open-Source solution.
Step by Step guide to adding Shelly devices to Apple HomeKit using HomeBridge
- Install Homebridge on your Mac/PC.
- Install the Shelly Plugin.
- Edit the configuration file.
- Run the plugin.
- Control devices on HomeKit.
01. Install Homebridge on Mac/PC
Before installing the Homebridge Shelly plugin, you need to install HomeBridge on Mac/PC. Check out how to install Homebridge on your device.
02. Install the homebridge-shelly plugin
You can install the homebridge-shelly plugin after installing Homebridge. They're said to be two ways of installing this plugin. The first one is using Homebridge UI X and the second one is by running npm install -g homebridge-shelly
Step 01: As the first step to installing the Shelly plugin, you can open the terminal on your device or open the Homebridge UI
Step 02: Install the homebridge shelly plugin as given below.
Install this plugin using the terminal:
npm install -g homebridge-shellyIt takes a few minutes to install the shell plugin. Also, you can check whether this plugin installation process is successful or not after installing the plugin.
Install the Shelly plugin using Homebridge UI:
Step 01: If you use Homebridge UI to install the Shelly plugin, you need to go to http://homebridge in your web browser.
Step 02: Then, go to the plugin in the menu bar and search homebridge shelly in the search field for the first generation of Shelly devices. For the next generation of Shelly devices, search homebridge shelly ng
03. Edit the configuration file (add the configuration to your homebridge config.json)
Once you install the Shelly homebridge plugin, you want to edit the configuration file. Here’re a few steps to edit the configuration file
Step 01: First, you want to navigate to the directory using the below command.
For the first generation of Shelly devices:
homebridge-shelly-platform/configFor the next generation of shelly devices:
homebridge-shelly-ng-platform/configStep 02: Then, you can simply add this shelly plugin to your homebridge config.json using the below command:
For the first generation of Shelly devices
"platforms": [
{
"platform": "Shelly",
"name": "Shelly"
}
]
For the next generation of Shelly devices
"platforms": [
{
"platform": "ShellyNG",
"name": "Shelly NG"
}
]
After that, you can discover your Shelly devices automatically. If you want to see a list of all discovered devices, go to http://<IP-ADDRESS>:8181/ (IP-ADDRESS - the address of the device that you’re running homebridge on)
Below are the configuration options you can use when adding configuration to your homebridge config.json
Network interface
If your Shelly Siri devices aren’t discovered automatically, or if there are any error messages like addMembership EADDRINUSE or addMembership EADDRNOTAVAIL, you have to set the “networkInterface” option to the local IP address or the name of the network interface.
Authentication
If there’s any problem with a username and password, you can set the “username” and “password” options.
Request timeout
If you want to configure the timeout for HTTP requests to the Shelly devices, this “requestTimeout” option can be used. (Specify in millisecond, Default - 10 second)
State timeout
If you want to configure how long a device can be offline (before it is regarded as stale and unregistered from HomeKit), you can use this “staleTimeout” option. (Specify in a millisecond, set - 0 or false to disable, Disabled by default)
Administration interface
By default, the HTTP server on port 8181 serves an administration interface. Also, you can disable this using “admin” . “enabled” to false and you can change the port number using “admin” . “port”.
Device specific configuration
You can set configuration for specific Shelly devices using “devices” array. And, the object of the array should contain the “id” property (with the ID of the Shelly device). Also, Ids are made up of 6 or 12 hexadecimal characters
This id can be found in the Shelly Cloud app/ the web interface of a device (under Settings -> Devices info -> Device ID)
General configurations
- “exclude” - set to true
- “username” and “password” - you can set username and password if there are any restrictions with the web interface of the device
- “name” - you can set a custom name
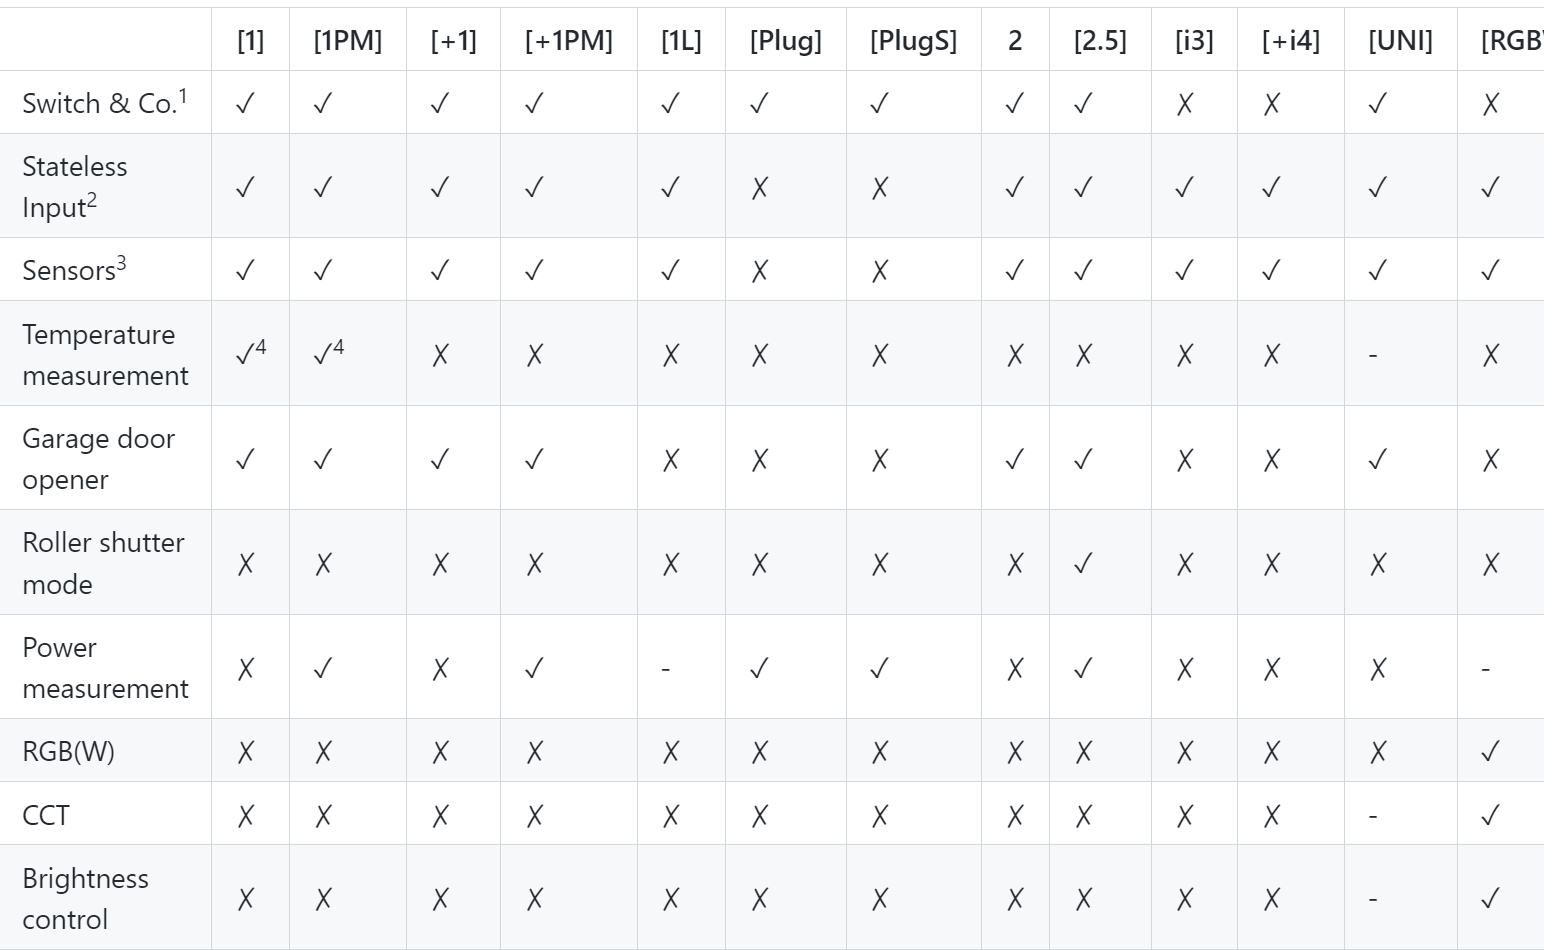
Shelly switch configuration
If you own Shelly 1, 1 PM, 2, and 2.5 in relay mode or 4Pro, EM, Plug, and Plug S, this configuration can be applied.
“type” - “ContactSensor” , “motionSensor” , “OccupancySensor” , “Outlet” , “switch” and “valve”
Shelly 2.5 configuration
“type” - “door” , “garageDoorOperner” , “window” , “windowCovering”
Shelly RGBW2 configurations
“colorMode” - you can set “rgbw” if you want to have HomeKit control all R, G, B, and W channels. And, you can set “rgb” to omit the W channel
Here’s the example of the configuration below for the first generation of the Shelly device:
"platforms": [
{
"platform": "Shelly",
"name": "Shelly",
"username": "admin",
"password": "pa$$word",
"devices": [
{ "id": "74B5A3", "exclude": true },
{ "id": "A612F0", "username": "admin", "password": "pa$$word2" },
{ "id": "6A78BB", "colorMode": "rgb" },
{ "id": "AD2214", "name": "My Device" },
{ "id": "1D56AF", "type": "outlet" }
],
"admin": {
"enabled": true,
"port": 8181
}
}
]
For the next generation of Shelly devices:
{
"devices": [
{
"id": "e.g. shellyplus1-abcdef123456",
"name": "My Device",
"exclude": false,
"hostname": "e.g. 192.168.1.200",
"password": "pa$$word",
"switch:0": {
"exclude": false,
"type": "switch"
},
"switch:1": {
"exclude": false,
"type": "outlet"
},
"switch:2": {
"exclude": false,
"type": "switch"
},
"switch:3": {
"exclude": false,
"type": "switch"
},
"cover:0": {
"exclude": false,
"type": "windowCovering"
}
}
],
"mdns": {
"enable": true,
"interface": "e.g. eth0 or 192.168.1.100"
},
"websocket": {
"requestTimeout": 10,
"pingInterval": 60,
"reconnectInterval": [ 5, 10, 30, 60, 300, 600 ]

}
}
04. Run the plugin
Step 01: First, navigate to the directory using: cd..
Step 02: Now, run the shelly plugin using:
homebridge -D -U ./config/ -P ./05. Bridge to HomeKit
Now, you can control your Shelly devices with Apple HomeKit after connecting homebridge to HomeKit. First, you need to go to the Home App on your Apple devices and scan the QR code of Homebridge UI or you have another way to connect the bridge to HomeKit. You can enter the 8-digit PIN code to connect.
06. Control devices on HomeKit
Finally, you’re ready to control all your Shelly devices with Apple HomeKit. Let's see what the Homebridge plugins and Apple HomeKit firm ware are.
Homebridge plugins and Apple HomeKit Firmware
There're several Shelly HomeKit support Homebridge plugins like Homebridge Shelly and HomeBridge Shelly NG. Also, Shelly Apple HomeKit supports to Shelly HomeKit firmware.
homebridge-shelly
The homebridge-shelly plugin enables you to control your Shelly devices (first generation of Shelly devices) with Apple HomeKit. This shelly homebridge plugin is available on GitHub.
Supported devices to the Homebridge Shelly plugin:
- Shelly 1
- Shelly 1L
- Shelly 1 PM
- Shelly 2 1
- Shelly 2.5 1
- Shelly 3EM
- Shelly 4Pro
- Shelly Air
- Shelly Bulb 2
- Shelly Button 1 3
- Shelly Dimmer
- Shelly Dimmer 2
- Shelly Door/Window
- Shelly Door/Window 2 3
- Shelly Duo
- Shelly EM
- Shelly Flood
- Shelly HD
- Shelly H&T
- Shelly i3
- Shelly Motion 4
- Shelly Plug
- Shelly Plug S
- Shelly Plug US
- Shelly RGBW2
- Shelly Sense
- Shelly Uni
- Shelly Vintage
homebridge-shelly-ng
The homebridge-shelly-ng plugin supports next-generation Shelly devices. So, Shelly Pro 4 PM HomeKit and Shelly Plus 1 HomeKit are no longer a dream.
Supported devices to the Homebridge Shelly NG plugin:
- Shelly Plus 1
- Shelly Plus 1 PM
- Shelly Plus 2 PM
- Shelly Plus I4
- Shelly Plus Plug US
- Shelly Pro 1
- Shelly Pro 1 PM
- Shelly Pro 2
- Shelly Pro 2 PM
- Shelly Pro 3
- Shelly Pro 4 PM
HomeKit bridge for shelly flood and Smoke sensor
This HomeKit Shelly project adds Home integration to the Shelly Flood, Shelly Smoke, and Shelly Plus H&T.
First, you need to a MQQT service. So that, you should run this project with this:
HT=Device1ID,Device2ID SMOKES=Device1ID,Device2ID FLOODS=Device1ID,Device2ID,etc homekit-shelly
Finally, you can add Shelly Bridge to your Apple Home.
Shelly HomeKit Power Saving Mode
There're three types of power-saving modes.
- Disable
- Light Sleep Mode - 1
- Modem Sleep Mode - 2
RavenSystem / esp-homekit-device
This RavenSystem firmware adds native Apple HomeKit support to any device like Sonoff, Shelly, or custom devices.
In addition to that, there's an advanced firmware - RavenCore v2 that allows you to configure any smart home device using a MEPLHAA Script.
Can you use HomeKit with old-generation Shelly devices?
If you're seeking to add old-generation Shelly devices to HomeKit, you can use them with HomeKit by flashing the devices with 3rd party recommended firmware. So, your old generation Shelly devices show up in your Apple Home App.
Shelly-HomeKit (Open source Apple HomeKit Firmware for Shelly Devices)
If you want to expose Shelly devices as HomeKit Accessories, this firmware HomeKit will be helpful for you. This only supports plugs and relays. Also, It is an Over The Air update (OTA).
Summary of Shelly HomeKit firmware supported devices and features
Now, you know how to use Homebridge with Shelly HomeKit, more about the Homebridge plugins and Apple Home firmware solution. Let's find a few HomeKit integrations.
- Shelly 1 flash HomeKit
- Shelly Dimmer 2 HomeKit
- Shelly Duo HomeKit
- Shelly Motion 2 HomeKit
If you think, you had better go with the plug-and-play solution, you can find a step-by-step guide to integrate Shelly Apple Home using the Plug and Play solution below.
Shelly 2PM Custom HomeKit Firmware and Homey Pro Support
Athom Homey Pro supports Shelly's custom HomeKit Firmware. You can now expose your shelly devices to your iDevices. Surprise! You're able to install the Shelly on the Homey with a few easy steps.
- Install the Shelly App.
- Log in to Homey.
- Select Devices tab and press the Plus button.
- Search for your Shelly device, choose the brand, select the device, and click "Install". If needed, try again.
- Add Shelly device details (IP Address, User Name, Password), and test the connection.
- Select the devices you'd like to test. That's it!
Step by Step guide to adding Shelly devices to Apple HomeKit using HOOBS
First, you need to plug in an ethernet cable and connect to your router. And Then, you need to plug in the power cable and wait 2 or 3 minutes while HOOBS in Box boots.
- Open a browser on your computer and navigate to http://HOOBS.LOCAL.
- Create your HOOBS Account and then open the Home app on your iPhone.
- In the Home app, tap "Add an Accessory" and scan the QR code.
- Tap "Add Anyway" if prompted, and your device will be successfully added.
- Install the Shelly plugin by clicking on "Plugins", then "Search", typing "Shelly", and finally clicking "Install Plugin".
- Return to your phone, open the Home app, and all your Shelly devices will be displayed.
- Rename the devices, assign them to rooms, and control them as needed. You can also add them to automations.
- Congratulations! You have successfully integrated Shelly devices with HOOBS for HomeKit, including Shelly i3, Shelly switches, Shelly plugs, and more.
How to add Shelly devices to HomeKit using Home Assistant
- Open Home Assistant on your browser.
- Go to Configuration and navigate to Devices and Services.
- You will see the Shelly devices listed, or click the Add Integration button.
- Type "Shelly", select it, and discover the devices.
- Press the Configure button, submit the configuration, select the room, and press Finish.
Shelly MQTT vs Tasmota MQTT
Shelly devices support Home Assistant MQTT protocol. Shelly MQTT offers less feature than the Tasmota MQTT. So, it is easier to use than the Tasmota. If you're an advanced user, you can go with Tasma as it 0ffers different configuration options.
Shelly Dimmer 2 HomeKit
Shelly Dimmer 2 for Apple Home Kit is the best Shelly HomeKit Dimmer with a built-in web server. It keeps control of your lights and connects your devices to your home Wi-Fi network. It is the world's smallest light dimmer that is especially suitable for smaller spaces. Let's see what're the key features of the Shelly Dimmer HomeKit.
Key Features of Shelly Dimmer 2
- Can control LED fluorescent lights or halogen lights
- It is suitable for installations in smaller spaces
- Can be used as part of a smart home system or independently
- Not require a zero switch
- Compatible with Apple HomeKit
- The signal range (50 m outdoors or 30 m indoors)
Also, you can find Shelly 1 HomeKit (shelly 1 Siri ) that supports Apple Home. So, you're able to control the lights within the Apple HomeKit.
Matter updates coming to Shelly products
If you want to talk to other devices directly and locally with no need to use the cloud, Matter is the right solution. No matters about matter anymore! Matter updates coming to several products including the Shelly. All of Shelly's latest smart devices are upgradeable to Matter protocol.
Shelly announced several products to support the Matter including a new smart smoke alarm. So, you can find Shelly Matter Devices now.
- Shelly Plug Matter Devices
- Shelly Relay Matter Devices
- Shelly Dimmer Matter Device
If your device supports new standard, it will work natively with Apple Home, Amazon Alexa, Samsung SmartThings, Google Home, and any other smart home platform that supports new protocol. Also, it can be controlled by Siri, Amazon Alexa and Google Assistant. So, we're waiting for the Shelly Home Kit Matter integration.
Best Shelly Matter Devices
Shelly H&T Gen3
Shelly H&T Gen3 is a new matter compatible Wi-Fi Temperature and Humidity sensor. As Matter compatible, it can be controlled through the Shelly Smart Control App, various protocols, platforms and voice assistants. It has features like Wall mountable, has an embedded web server, low battery consumption and works with type-c USB slot.
Shelly Plus series
Shelly Plus Series Devices are compatible with Matter now. So, you can control your Matter enablled Shelly Pro series products with Matter enabled ecosystems such as Apple HomeKit. Amazon Alexa, Google Home and Samsung SmartThings.
Shelly Pro Series
Shelly Pro Series Devices are compatible with Matter protocol such as Shelly Pro 1, Shelly Pro 2, and Shelly Pro 3.
Best Shelly Smart Home devices
Let's take a look at the affordable Shelly Smart home products that can be controlled through the Shelly App.
Shelly Relays
Shelly Relays are designed to sit inside a wall switch box. They can be exposed to many Smart Home Automation hubs like Google Home, Amazon Alexa, and SmartThing. Shelly clouds are used to do this.
If you want to turn a dumb switch into a smart switch, relays enable you to add a smart switching capability to any circuit. Also, Shelly 2.5 can work for a roller shutter. Furthermore, Shelly relays are in different sizes. Shelly 2.5 HomeKit firmware is the smallest one and Shelly one HomeKit is the largest one.
Homebridge-Shelly and Open source iOS Firmware support Apple HomeKit. So, you can easily integrate Shelly HomeKit Relay.
Shelly 1 Plus WiFi Switch
This switch is one of the shelly switch that you can create Shelly HomeKit switch integration. You can enhance your smart home control with Shelly Plus 1. It has a small design to fit behind every wall switch or wall socket. Also, you can automate the lights, control the garage door, and automate your irrigation system. You can make your dump switch smart by adding Shelly with HomeKit (Shelly 1 with HomeKit).
It’s time to go with Shelly Plus. You may buy this Shelly 1 Plus from Amazon for 19.50.


Shelly 1 Relay Switch
If you want to control your home appliances such as lights, sockets, garage doors, curtains, conditioners, and security systems from anywhere, you can use this WiFi-operated relay switch. It has Bluetooth connectivity, packs an extremely fast processor, improved integration, and quicker connectivity.
Apart from this relay switch, you may get this Shelly 1PM Relay Switch from Amazon. It is the best alternative to Shelly 1 Relay Switch.

Shelly 2.5 Relay Switch
No matter where you are. This Shelly Relay Switch controls your home appliances via your smartphone. Not only that, but you can also control its electric consumption. It has an embedded web server. So, It doesn’t need any additional controller or hub to set up Shelly. Furthermore, It has two electric circuits and functions as a standalone device. Also, you can add Shelly Relay Switch to Siri using the homebridge plugin.
Shelly Plus Plug US
Shelly Plug US is the WiFi smart plug that fits everywhere. It can connect to any WiFi network and operate as an access point. No matter where you are! You can control the Shelly Plug US from your smartphone. Including features such as highly compatible, a wide range of voltage support, sunrise/sunset schedule, weekly schedules, power metering, and countdown timer. Also, you can add this Shelly em to HomeKit with the homebridge solution.
If you want this next-generation Wi-Fi operated Plug, you may buy this from Amazon.

Shelly RGBW 2 Controller
One simple step makes your LED strip smart. The Shelly RGBW2 can be connected to any LED controller and gives you the ability to manage your lighting remotely using a tablet or mobile device. Control 12-24V DC, dim, meter power, and choose colors from a wide range of RGB colors. It is made to install quickly and simply under an existing light switch, socket, junction box, or electrical box.
If you want to create the perfect home atmosphere for your home, you may buy this from amazon.

Shelly Duo WiFi Smart Bulb
Now that you don't leave the lights on, your home won't welcome you in the dark. You can connect the Shelly Duo bulb directly to your Wi-Fi at home and control lighting at home. Also, you can choose a color temperature between 2700K and 6500K. And, there’re many features such as WiFi on board, cloud and MQTT enabled, dimmable, voice control, smart wake-up, and night mode.
Also, there are many Shelly devices available in the market now. Plus, you can integrate your Shelly dimmers, switches, garage door opener and most Shelly devices to Apple. So, setting up Shelly Cloud HomeKit like Shelly Dimmer Apple HomeKit, Shelly 1 plus HomeKit, Shelly HomeKit Garage Door is now easy.
How to fix shelly homekit No Response in HomeKit
- You can try changing Wi-Fi chanels first.
- Update your firmware.
- Sometimes. it may be a router problem, so you cange your router.
- Shelly Switch - Plug the AP directly into the router.
- Try with 2GHz only WiFi.
- Do a factory settings on your APs and router, and start configuring everything from scratch.
Conclusion
As we mentioned above, Shelly devices can be added to Apple HomeKit using Homebridge or HOOBS solution. Also, there is an Apple HomeKit firmware for Shelly devices. This is an open source Apple iOS firmware.
Now, you know how to add Shelly devices to Apple HomeKit, instead see How to add Tuya devices to Apple HomeKit to know more about Tuya HomeKit.
FAQs about Shelly HomeKit
1 Does Shelly support HomeKit?
Shelly devices don’t officially support HomeKit. If you want to add your Shelly to Home Kit, you can use a third-party software solution (Homebridge) and Hardware solution (HOOBS, Raspberry Pi) for that.
2 How do I add Shelly to Homebridge?
You can add Homebridge with the simple steps below:
- Install Homebridge to your device
- Install Shelly Plugin
- Add configuration to homebridge config.json
- Run Shelly plugin
- Control Shelly devices on Homekit
3 What is Apple HomeKit firmware for Shelly Switches?
Using Apple HomeKit firmware, you can add your Shelly Switches to Apple Homekit. Shelly HomeKit update requires Shelly iOS HomeKit conversion. If you update this, you can easily add multiple devices to HomeKit.
4 What are Apple HomeKit archives?
HOOBS
Mongoose OS
Homebridge
5 Which shell do I need?
You need to know how to choose the best model. If you want to control lights or control a device with maximum load of 16A, you can choose Shelly 1. Also, if you want to control a passive wireless light, you can go with Shelly 1L.
6 Is Shelly 2.5 HomeKit compatible?
Shelly 2.5 isn't compatible with HomeKit. But, you can integrate Shelly 2.5 with HomeKit with few solutions as mentioned above.
7 Will Shelly support Matter?
Yes, Shelly announced that the new Shelly devices will be compatible with Matter.
8 Is Shelly firmware open source?
Yes. Shelly HomeKit is an open-source Apple HomeKit firmware for Shelly devices.
9 How to flash Shelly HomeKit?
If you want to flash Shelly HomeKit, you can use the following URL (Note: You need to replace A.B.C.D with your device's current IP address):
<>br
http://A.B.C.D/ota?url=http://shelly.rojer.cloud/update
After a minute, you will see the LED blinking and then you can see a different web interface at the same device address.
Finally, you can script for an automated way to update your devices as given below:
./flash-shelly.py hostname (for a single device)
./flash-shelly.py -a (for all devices on the network)
10 Can I add Shelly Switch to HomeKit?
Yes. Adding Shelly Smart Switch to HomeKit is easy with Enomek - HomeKit Enabler. You can select any affordable solution and follow a step-by-step guide using this tool.
11 How to add Shelly Button to HomeKit?
You can connect Shelly Button with HomeKit with Enomek App. Not only Shelly Button, you can add Shelly bulbs, and Shelly Garage Door Opener to Apple HomeKit.
12 What is Power measurement with homekit firmware?
If you want to expose the power consumption to Homekit, you can install Shelly 1PM power consumption firmware for that.