6 ways to Add any Ring to Apple HomeKit [Step by Step Guide]
Want to control your Ring doorbell or camera with Apple Home App? It is possible via the solutions discussed in this article. I will be talking about the best ways and their pros and cons, to Add Ring Devices to Apple HomeKit.
Here are the best ways to add any of your Ring smart home devices to Apple Homekit
Ways to add your Ring devices to Apple HomeKit
1. Enomek [Recommended Solution]
If you want to add your smart home devices to Apple Home Kit to control your smart devices using Apple Home App and Siri voice assistant. Enomek is able to serve any smart home device to Apple HomeKit. Enomek enables adding any app on Apple HomeKit using Homebridge and HOOBS solutions.
Step guide for Enomek App Installation
2. Athom Hub [Cheapest way]
The ATHOM HomeKit Homebridge Hub is the cheapest solution for integrating Ring devices into your Home Kit. It comes pre-flashed and features a specially compiled server that seamlessly integrates with Apple HomeKit.
Here are some key advantages of using the ATHOM HomeKit Homebridge Hub:
- Seamless Apple HomeKit integration
- Easy setup process
- Cost-effective solution
- Best alternative to Homebridge
- Plug-and-play solution
If you're seeking an affordable and hassle-free way to integrate your non-HomeKit devices into Home Kit, the ATHOM HomeKit Homebridge Hub is an excellent choice. You can even use this to add any Meross smart device to Apple HomeKit.
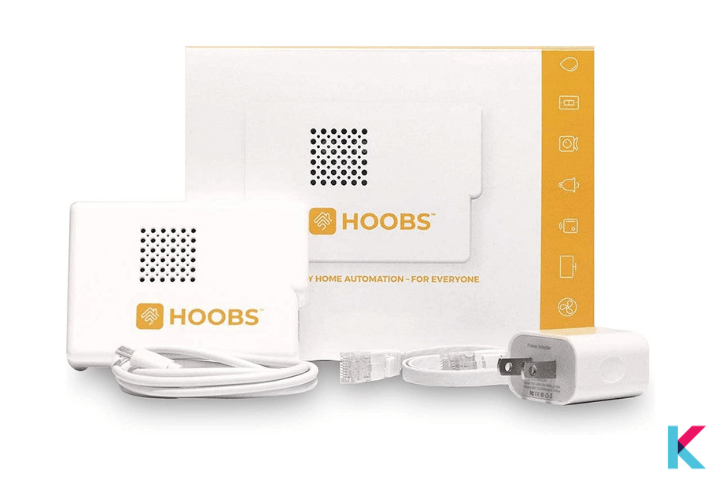
3. HOOBS
HOOBS is one of the Hardware-based solution that stands for Homebridge out of the box. You can convert non HomeKit devices into HomeKit compatible with HOOBS. It also can integrate many devices with HomeKit. And yeah! It is compatible with over 2000 accessories now.
4. Raspberry Pi
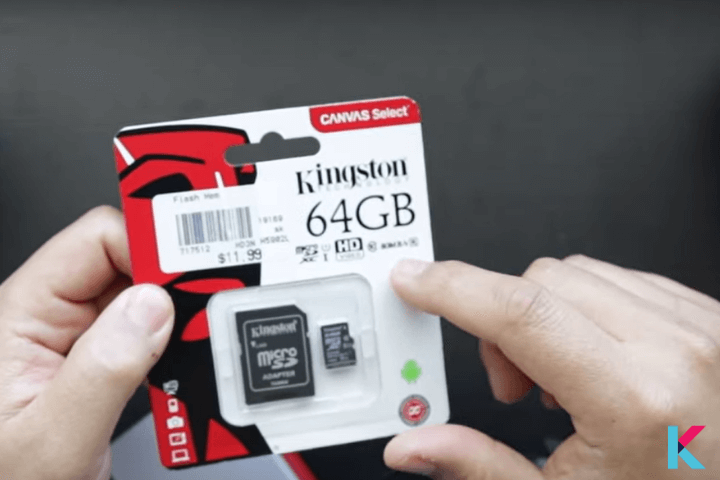
Raspberry Pi is a popular low-cost single board computer. If you plan on running your Raspberry Pi through WiFi, you’ll need to connect your Pi to your home network. Also, you’ll need a minimum 4GB microSD card and admin tights on a separate OS (Window, Mac, Linux) apart from the Pi (Note: To flash Homebridge onto the microSD card).
5. Homebridge
Homebridge is a lightweight server and third-party software application. It is designed to unify your entire smart ecosystem under one simple control system. In other words, it is a bridge between HomeKit and the third-party application.
You can find our step guide to add Ring Devices to Apple HomeKit using Homebridge.
6. Scrypted
Scrypted is a open source solution that run as a service. It provides an intermediary between different devices and major smart home echo systems, such as Amazon Alexa, Apple HomeKit, and Google Home.
This is best alternative to Homebridge. But, Scripted can bridge most of your cameras with full HomeKit secure video support. Ring Scrypted HomeKit integration doesn’t support other Ring connected devices such as Ring Alarm sensors or modes.
If you want to know more information about Ring HomeKit integration, you can dig further.
What can you do with Ring-HomeKit integration?
Can Ring and Apple HomeKit work together? Unfortunately, HomeKit and Ring are incompatible technologies. You can easily control your camera stream, turn lights on/off, and trigger your HomeKit Ring Alarm from the Home app with HomeKit integration for Ring devices. You can make many integrations such as Ring HomeKit camera, Ring HomeKit doorbell, Ring HomeKit Hub, Ring HomeKit secure video, and more.
Let's see How to add any smart home devices to Apple HomeKit
Ring HomeKit compatibility - Does Ring work with HomeKit? This is frequently asked question from HomeKit Ring users. Actually, the Ring doesn't work with HomeKit like thousands of other products. But, we have solutions for that.
Ring Doorbell with HomeKit
Now, you can add Ring Doorbell to HomeKit with the above solutions. Once you integrate, you can monitor your ring doorbell by clicking on the doorbell icon on the Home app. You will get a notification if someone rings your doorbell. So, you can create HomeKit Doorbell easily with HomeKit integration with Ring using Enomek.
Ring security cameras with Home Kit
It is similar to the Ring doorbell. You can easily add Ring camera to HomeKit. It also works very smoothly with your HomeKit. You can get motion sensor alerts, rich notifications, and also snapshots from the camera. You can able to open a live stream from the Ring app.
HomeKit Ring Alarm
Adding Ring Alarm with HomeKit is easy with the Enomek solution. When integrating with HomeKit, the ring alarm works as a fantastic gadget. You can able to arm or disarm the alarm from your home app. Also, you can set up personalized automation using your HomeKit.
Ring Smart Lighting with HomeKit
You can use the Home app to control and trigger all Ring Smart Lighting products such as path lights, spotlights, and floodlights. Also, you can use it with your Ring camera or alarm to get protected from intruders. It is automatically triggered when you have an intruder.
HomeKit Notification
You can received various notification such as triggering notifications from the Ring sensor, motion notification from your camera, Ring doorbell rings on your HomePods.
How to use Ring with HomeKit? Let's see how to connect Ring to Apple Home Kit using Homebridge.
Step by Step guide to connect Ring to Apple Home Kit using Homebridge
- Install Homebridge to your device.
- Install Ring Plugin.
- Edit the configuration file.
- Run the plugin.
- Control devices on HomeKit.
Now, you can easily add your Ring device to HomeKit using Homebridge with this step guide.
01. Add Homebridge to Mac/PC
You can easily add add any device to HomeKit with a few steps. As the first step, you need to add Homebridge to your Mac or PC. Want to know how to install Homebridge on Mac or PC ? Then, you can find Homebridge article to know about add Homebridge to Mac/PC.
02. Install Ring Plugin
Once you have added Homebridge to your Mac/PC, you need to install the homebridge ring plugin to your computer.
- Open the Terminal on your PC
- Install the Homebridge plugin using terminal or Homebridge UI
Plugins are Node.js modules published through NPM as well as tagged with keyword homebridge. So, this plugin has a name with the prefix homebridge- such as homebridge-ring. Now, install the Ring plugin using:
npm i –g –unsafe-perm homebridge-ringor
npm i –g homebridge-ringHere're the steps for downloading the Ring plugin using Homebridge UI.
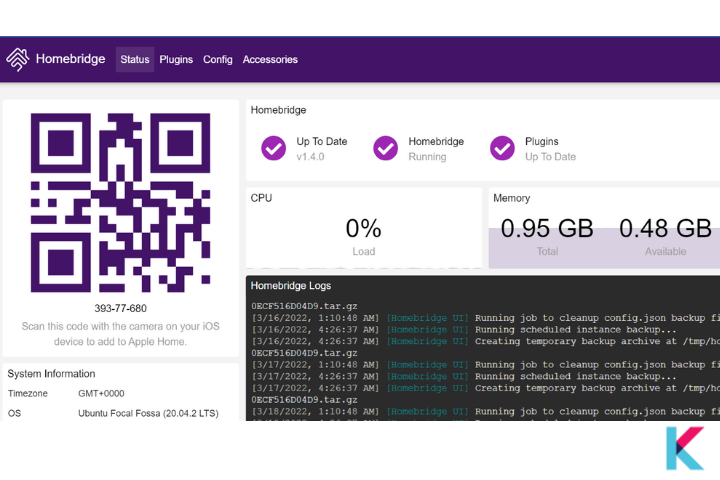
Step 01: Open Homebridge in your web browser (http://homebridge)
Step 02: Click on the plugin in the menu bar
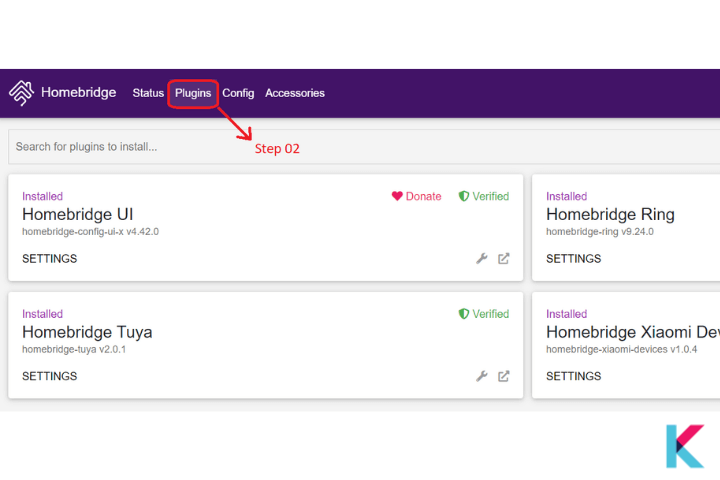
Step 03: Search in the search field for Ring HomeKit bridge as shown in the image
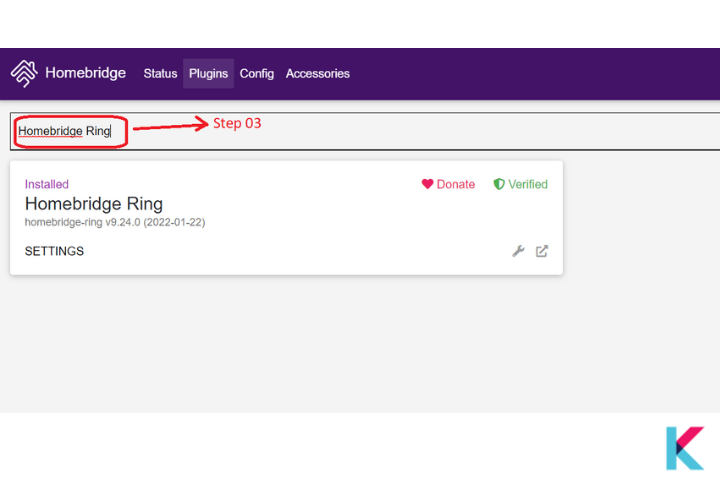
Step 04: Install the verified version via the install button
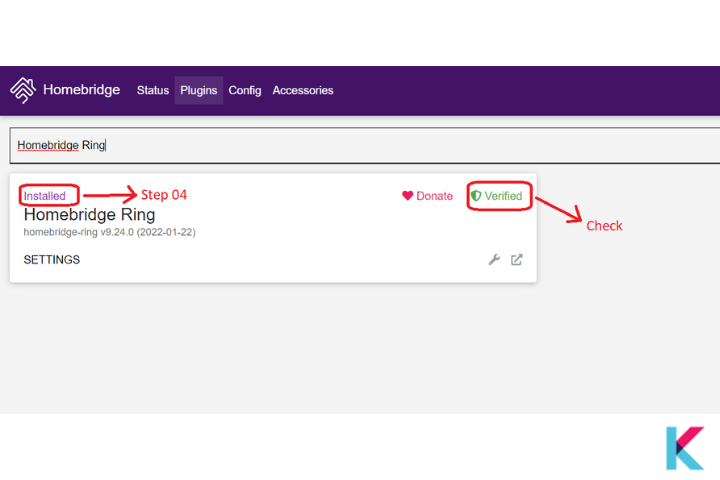
It takes a few minutes to install the plugin. Once the plugin is installed you have to check whether the installation is successful or not.
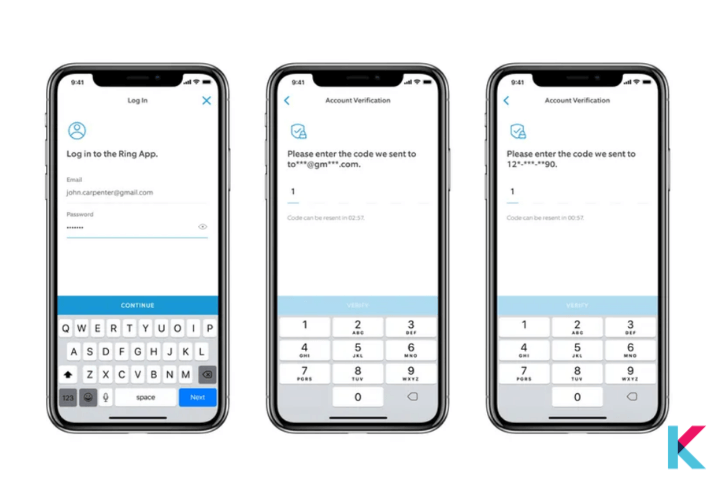
- log in with your Ring account (username and password) and verification will take place
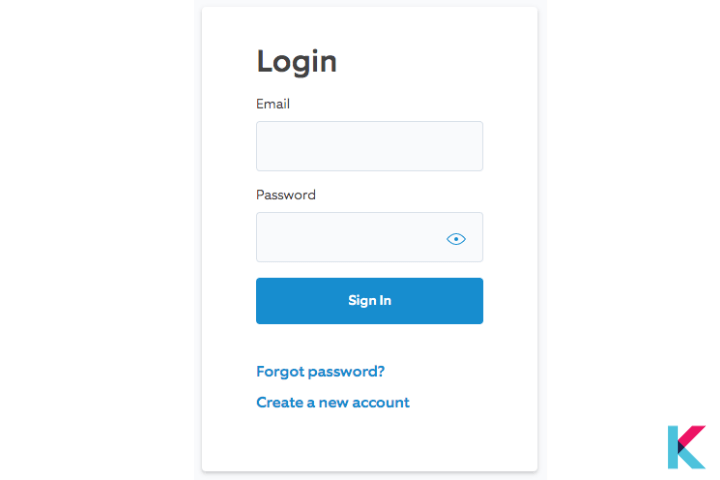
- Enter the code received and click on “Verify code”
- Click on the on/off symbol in the menu bar to restart Homebridge
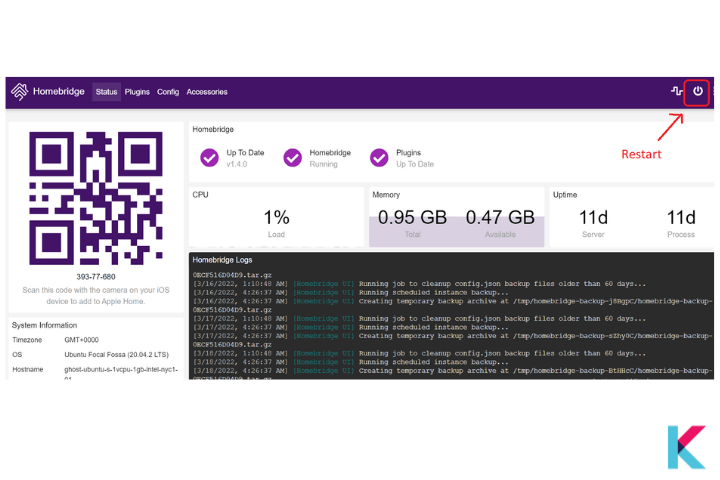
- Your Ring device will be visible automatically in the Home App after Homebridge has restarted
03. Edit the configuration file
You want to edit the config.json file of Homebridge before you run the plugin. Then add the Ring platform in your homebridge json file. Here, you can use homebridge-config-ui-x to do the easiest configuration which you can enter your Ring credential to get logged in. Also, the configuration screen will appear once the plugin has been installed.
Now, Ring requires the use of two-factor authentication for all accounts. To turn on the two-factor authentication, they want a special refresh token. It allows you to bypass email, password, and two-factor authentication together.
Edit ~/.homebridge/config.json, inside "platforms": [ ... ] add:All you need to do is run the following commands to get the refresh token.
If you have installed homebridge-ring globally, you can use:
ring-auth-cliIf you don’t have installed homebridge-ring globally,
npx -p ring-client-api ring-auth-cliAfter then you’ll see a refresh token after entering your information in the output.
Copy the refresh token > Open up your config file using:
ring-client-APIRemove your email and password values > add refresh token: "TOKEN FROM COMMAND ABOVE" > Restart your home automation app
Then, do the basic configuration. (Note: Do remember! You can change the username and password but keep the existing formatting and length)
{
"platforms": [
{
"platform": "Ring",
"email": "some.one@website.com",
"password": "abc123!#",

// For 2fa accounts only.  See below for details
"refreshToken": "TOKEN GENERATED FOR 2fa ACCOUNTS",

// Optional. DO NOT INCLUDE UNLESS NEEDED.
"locationIds":
["488e4800-fcde-4493-969b-d1a06f683102", "4bbed7a7-06df-4f18-b3af-291c89854d60"],
"alarmOnEntryDelay": false,
"beamDurationSeconds": 60,
"hideLightGroups": true,
"hideDoorbellSwitch": true,
"hideCameraMotionSensor": true,
"hideAlarmSirenSwitch": true,
"cameraStatusPollingSeconds": 20,
"cameraDingsPollingSeconds": 1
}
 ]
}
04. Run the plugin
Step 1: Navigate to the directory using your Homebridge plugin (Ex: homebridge-nest)
Step 2: Run the plugin using:
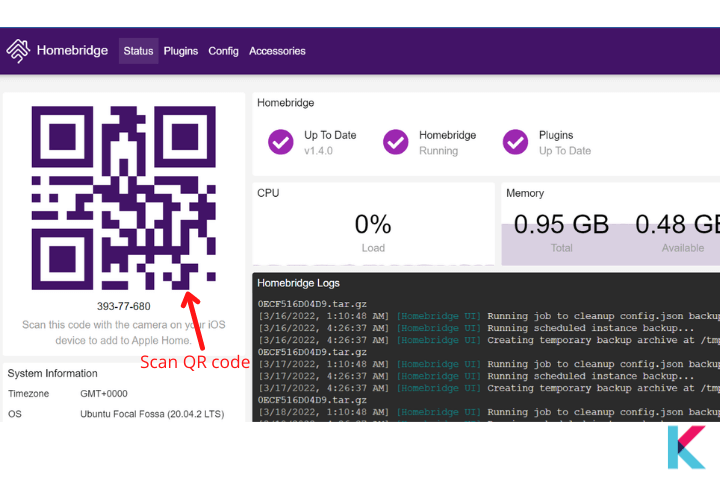
homebridge -D -U ./config/ -P ./05. Bridge to HomeKit (Adding Ring HomeKit bridge to iOS)
Step 1: Open the Home app on your Apple Device (iPhone or iPad)
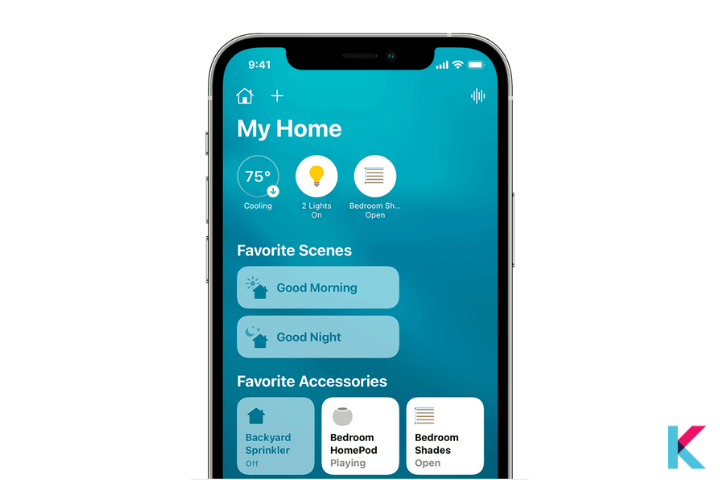
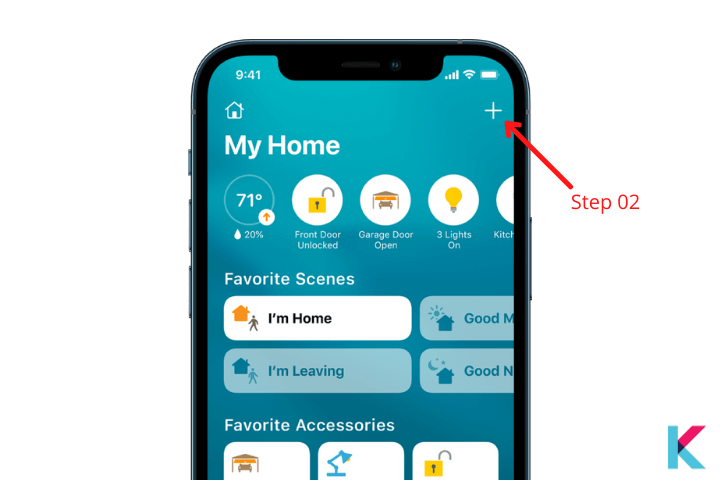
Step 2: Then, you need to tap the Home tab and + (plus) button in the top right
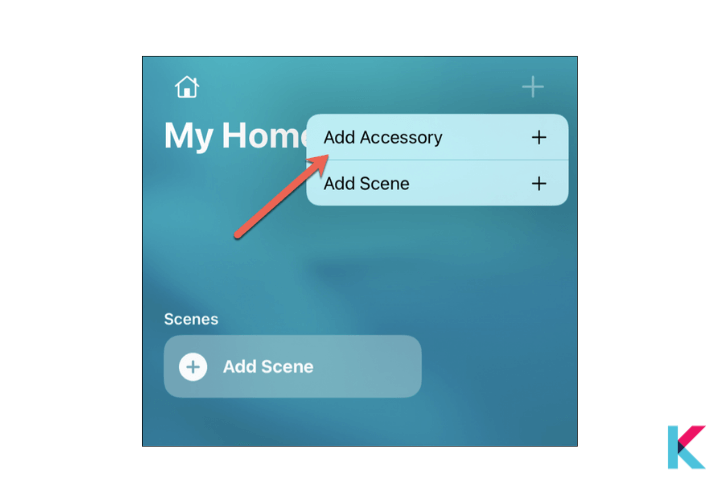
Step 3: Next, Tap Add Accessory
Step 4: Scan QR code in the Homebridge UI using your iPhone or you can enter the 8-digit PIN code. (If you don’t remember PIN code, you can find code in the config.json file)
06. Control device on HomeKit
Once your smart devices have been added, you can be able to tell Siri to control them. Also, you can give a name to your device. So, Siri can easily recognize your device and control it.
How do you connect your Ring Doorbell to Apple HomeKit with hardware solution? Let's find out.
Step by Step guide to add Ring device to HomeKit using HOOBS
- Plug in the Raspberry Pi.
- Connect HOOBS to your network.
- Pair HOOBS with Homekit.
- Install the Ring plugin.
- Connect the plugin to your Ring account.
HOOBS offers 3 ways to get your initial setup. So, you can do your initial setup using one of the following methods.
- Download the image and image a Micro SD card yourself
- Buy just a pre-imaged Micro SD card. So, you can plug it into an existing Raspberry Pi
- Buy a pre-configured Raspberry Pi-based device directly from them
HOOBS can be installed on Debian 10.10, Ubuntu 20.04, or Raspberry Pi OS (any Debian). Let's see how to install HOOBS on Raspberry Pi.
01. Plugin the Raspberry Pi
Firstly, you need to unbox your Pi, and then insert the prepared MicroSD card. Now, you can power it up. Also, you can see some instructions for setting up WiFi and connecting to the UI if you have a monitor connected.
02. Connect HOOBS to your network
Once connected to the Raspberry Pi, then you need to set up HOOBS on your network. If you have used a wired Ethernet connection, HOOBS already takes care of network configuration. But, you just connect it to temporary Wi-Fi. Do following steps
- Plug the HOOBS box into an outlet
- Connect HOOBS to your router with included plug and micro USB cable
- Check for the Wi-Fi network ‘HOOBS’ on your iPhone.
- Once connected, prompted to select your Wi-Fi network
- Enter the passphrase (Note: Now, configure the HOOBS box on your network)
- Next, fire up a web browser and If you are on a Mac open your web browser to connect to the HOOBS device and then go to http://hoobs.local
- After a few minutes, you’ll get the HOOBS startup screen and then enter your username and password to create an account (You can see a box to set up an administrator account and password)
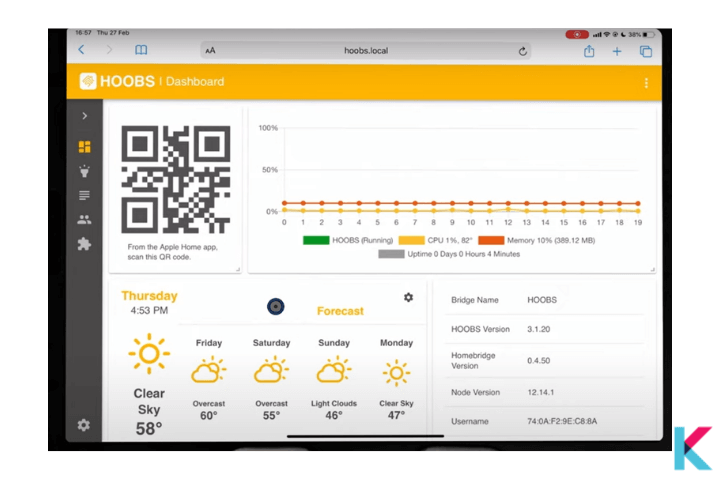
03. Pair HOOBS with HomeKit
Then, you’ll see the dashboard and as the next step, you want to add your new Ring bridge to HomeKit before adding the ring plugin.
- You can see the QR code on the dashboard
- Go to the Apple Home app
- Add a new accessory in the Home App
- Scan the QR code with your phone camera
- Now, you can check whether add the list of hubs and bridges in the home app
- Go to the Home icon in the top left
- Then, scrolling down to Home settings
- After then, open the Hubs and Bridges section
- Finally, you can assign your HOOBS device to a room
04. Install plugins (Adding your first plugin)
You must know what accessory you want to add first. So, you can search for the Ring plugin in the plugin section.
There’re two plugins namely Accessories and Platforms
Accessories – it is a device that can be directly controlled by HomeKit. But, it needs you to add individual devices in the accessories section after installing the plugin.
Platform – It requires communication via the vendor’s web service. But, This plugin won’t require anything more to be added once configured in HOOBS
- Once connected to HomeKit, go to the HOOBS dashboard
- Click on the Plugin icon on the toolbar
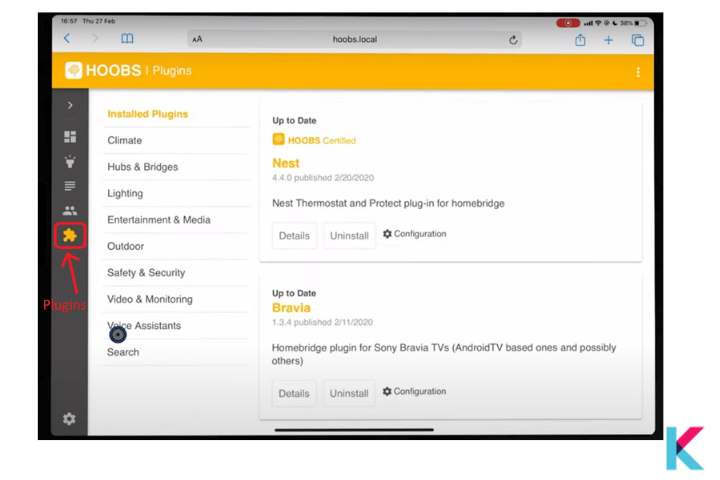
- Search “Ring” plugin in the search field (Enter the accessory or brand that you’re looking for in the search bar)
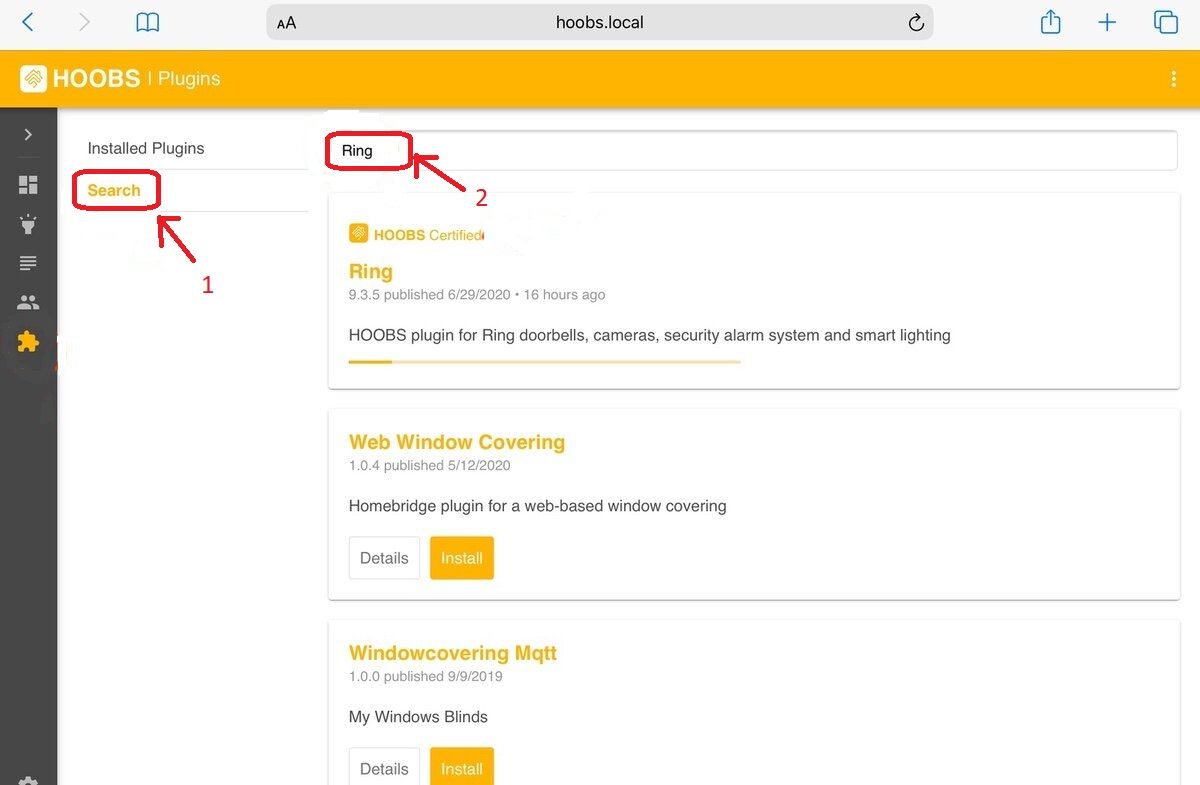
- You just click on the install button (HOOBS certified logo above it)
- You can see this installed plugin under the plugin section
05. Connect the plugin to the Ring account
- Click the ‘three dots’ menu of HOOBS
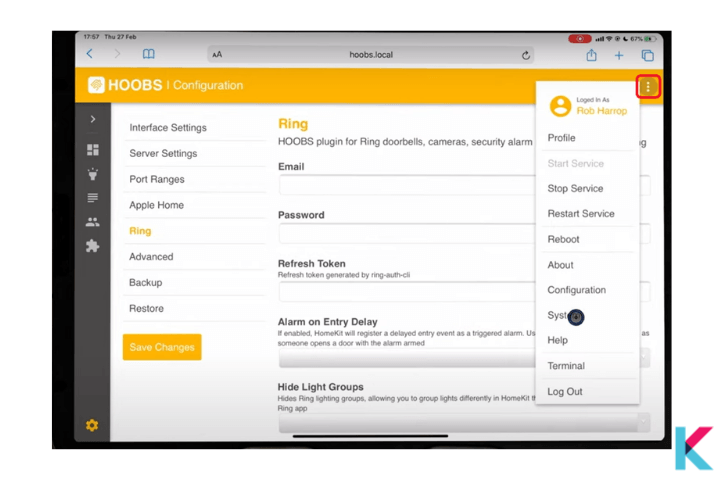
- Then, you can click on the terminal
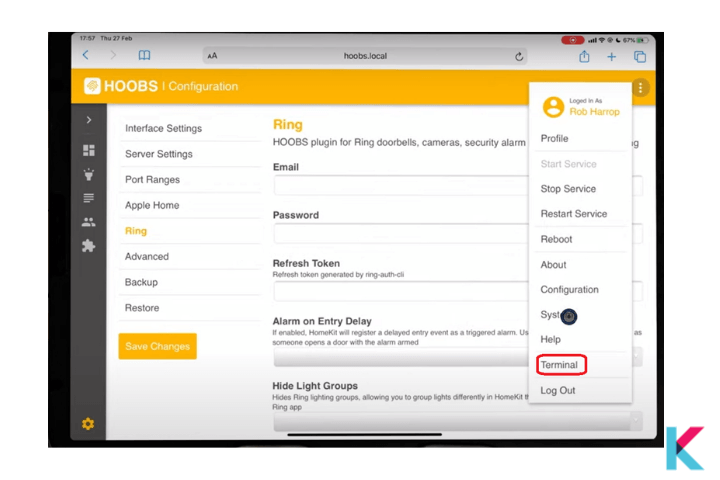
- Type the following commands and press enter :
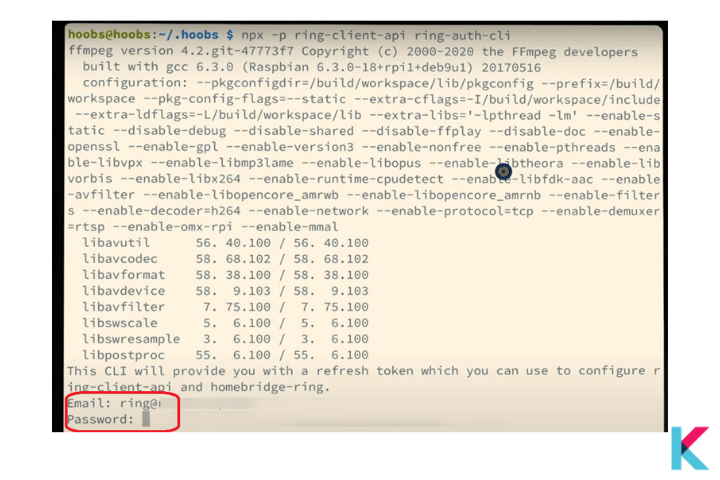
npx -p ring-client-api ring-auth-cli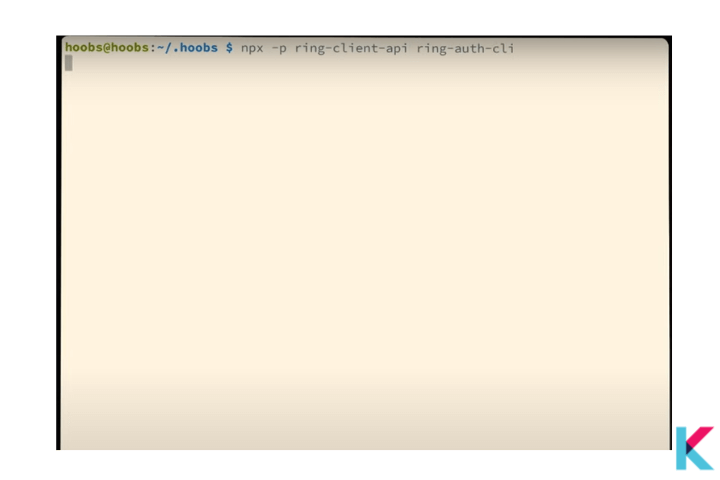
- Now, you’ll see a prompt and then enter your Ring email and password
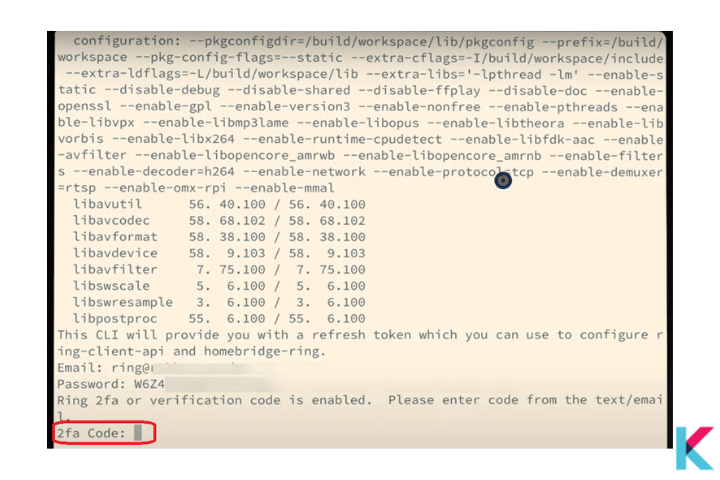
- You’ll get a two-factor code (Enter into the prompt)
- After that, generate a long string in double quotes and copy it
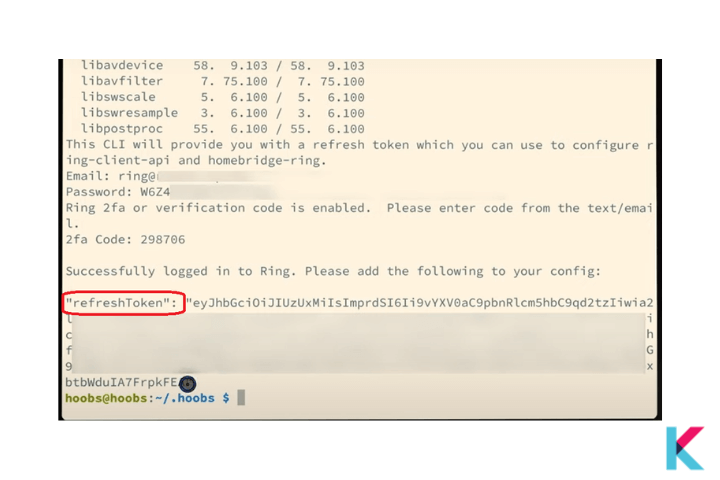
- Click the plugin menu icon and then click configuration
- Now, you can paste a long string into the Refresh Token
- Finally, save changes
06. Add Ring Accessory to HomeKit
Once added to HomeKit, you want to find it under “bridges” in the Home setting
(Home icon > Home setting..> Select Home > Hubs and Bridge > Bridge > Click on the bridge > show device setting
- Add Homebrdige to iPhone
- Open the Home App on Apple Device
- Select Add accessory
- Tap can’t scan or don’t have a code
- Then, you can select your HomeBridge
- Display (uncertified Accessory)
- Select Add anywhere
- Manually enter HomeKit set up code
- Add Homebridge devices to your home
Now, you can control your Ring device with HomeKit using HOOBS.
Instead, if you own myQ devices, you may be interested in learning How to add myQ devices to Apple HomeKit . Let's see how.
Step by Step guide to add Ring Devices to HomeKit using Raspberry Pi
Let's see how to integrate Ring and Apple Home using Raspberry Pi.
Before you begin – What you’ll need
- Supported Raspberry Pi Models
- A 4GB or larger SD card
- A Windows, macOS, or Linux computer with an SD reader
Let's see Steps by Step Guide to add Ring devices to HomeKit
- Download and Flash to SD card.
- Connect to Network.
- Manage Homebridge.
- Connect to HomeKit.
- Install and configure the plugin.
Here's the easy steps guide to add Ring devices into HomeKit using Raspberry Pi.
01. Download and Flash to SD card
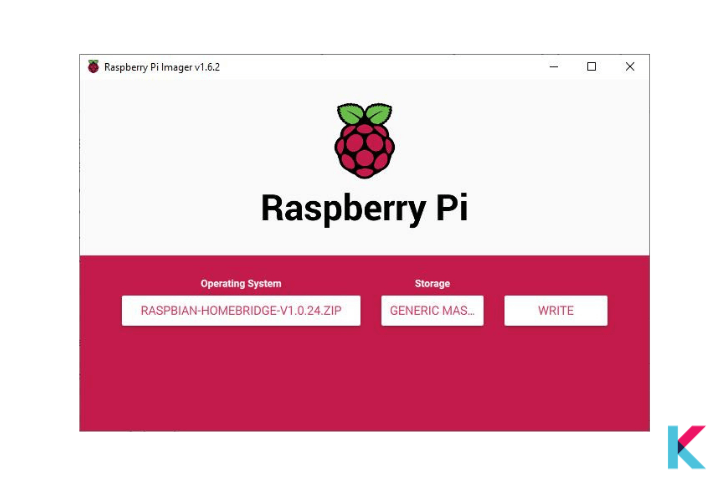
No sign up required to use Homebridge Raspberry Pi Image (It is completely free). Raspberry Pi imager is the easiest way to flash the Homebridge Raspberry Pi Image to your SD card.
Step 01: Download the newest version of Raspberry Pi Image and open the Raspberry Pi Imager Application. Download Raspberry Pi
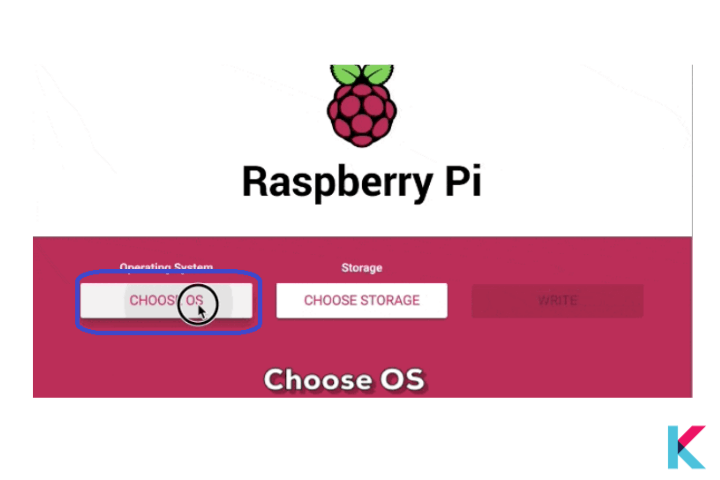
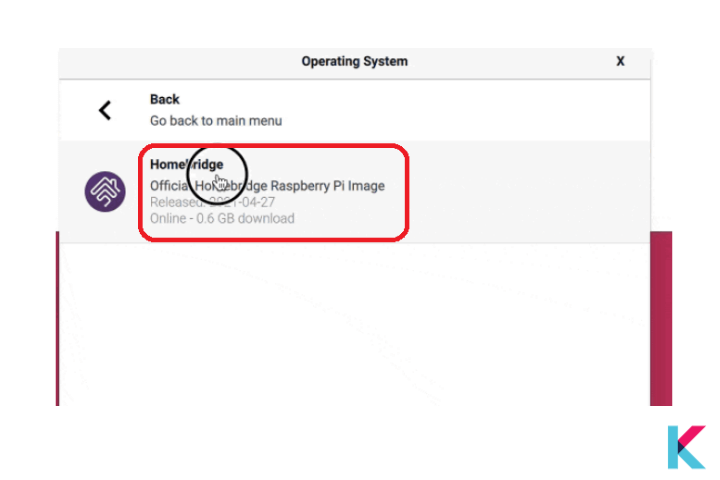
Step 02: Next, you need to click the choose OS button
Step 03: Scroll down and select the “other specific purpose OS” category as shown in the image bellow
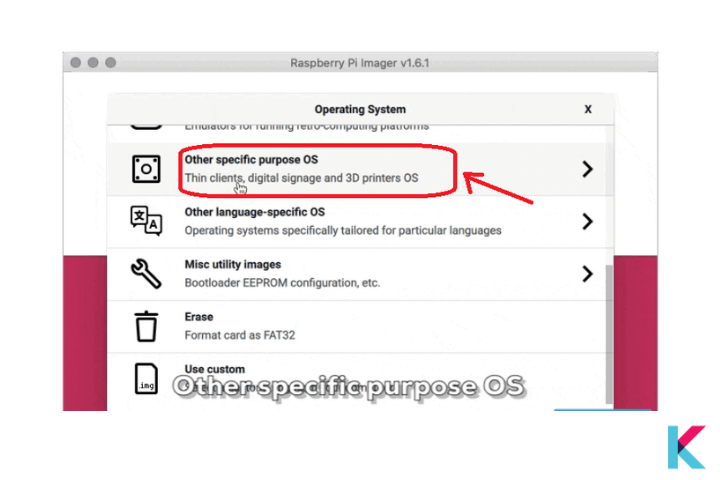
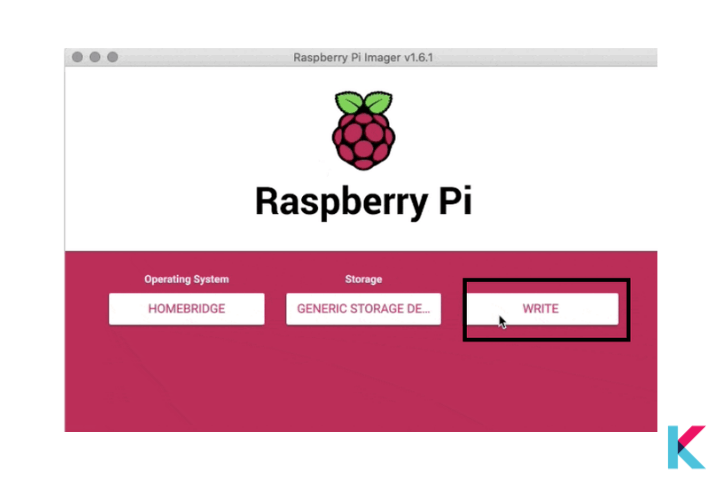
Step 04: Select Homebridge, then choose the latest Homebridge image
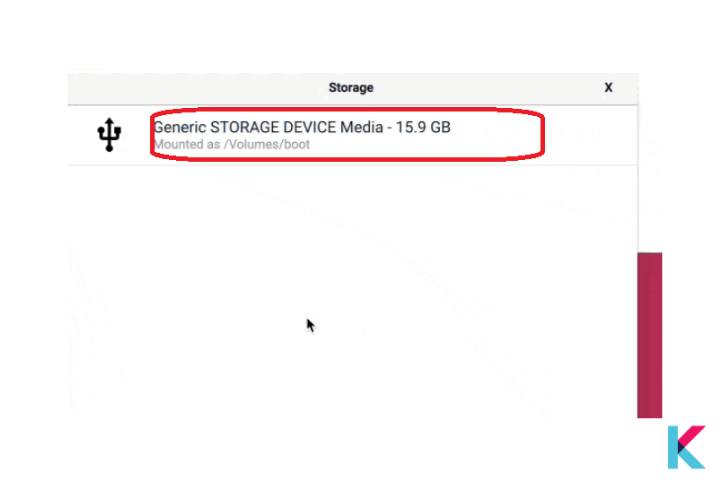
Step 05: After then, click choose Storage and select your SD card
Step 06: Finally, click the write button
02. Connect to Network
You can connect your Pi using Ethernet or Wi-Fi. If you want to connect Raspberry Pi using Ethernet, no need to do the additional configuration. All you need to do is power on your smart device for the first time.
But, if you have decided to connect your Raspberry Pi using Wi-Fi, follow these steps
1. Power on your device (without an Ethernet cable attached)
2. Scan for new Wi-Fi network (Use your mobile phone)
3. Connect to the hotspot named Homebridge WiFi Setup
4. After a few moments open the captive portal and then you can connect the Raspberry Pi to your local Wi-Fi network.
03. Manage Homebridge
Using the Homebridge user interface, you can install, remove, update the plugin, and modify the config.json file of Homebridge. (Default username and password is both admin)
If you’re a Mac user, you want to access the user interface via http://homebridge.local. Otherwise, if you’re a Windows user, you need to find the IP address of your Raspberry Pi. Follow these steps
To find the IP address
- First, you have to log in to your router and find the “connected devices” or “dhcp client’ page
- You can use your iPhone to access http://homebridge.local (You can find the IP address under System Information once you login homebridge using the default username and password)
- You need to download the Fing app for iOS or Android to scan your network
- Once finished booting the IP address will be displayed on the attached screen, if you plug a monitor into your Raspberry Pi
04. Connect to HomeKit
Step 01: Open the Home app on your Apple device
Step 02: Tap the home tab and plus (+)
Step 03: Tap Add Accessory, then scan the QR code
If you add accessories for the first time, you may get a message saying Additional Setup Required. So then, when you add a plugin, it appears in the Home App without any permission.
How to use Home Assistant to connect Ring devices
You can add Ring Binary sensors, Camera, Sensor and Switch to HomeKit using Home Assistant.
- Go to the Home Assistant.
- Then, select "Setting" in the sidebar.
- Select "Devices and services" from the configuration.
- Select the Add integration button.
- Search for Ring and select it.
- Follow the on-screen instructions.
You can enhance your Ring Apple Home Experience with Home Assistant now. Let's find out Ring HomeKit support devices for 2023.
How to connect Ring Matter devices to Apple HomeKit?
Ring devices aren't compatible with Matter Smart Home Protocol yet. But, we can expect Ring Matter compatible devices in the near future. A new Matter Ring doorbell and a new Ring alarm system will be released soon according to Ring.
So that, you can follow the basic steps to connect Ring Matter Devices to HomeKit.
Step 01: First, you need to open Apple Home App
Step 02: Then, go to the App and open the menu
Step 03: Select "Add accessory" and Scan the QR code in the Ring Matter device
Step 04: Click on "Add to home" after appearing the device name
Step 05: Then, you can give the location and name it.
Reddit Discourse on Ring HomeKit Integration
If you are wondering what the trusty redditors are saying about an integration between Ring and HomeKit, let me summarize things for you. I haven't tried these methods so I cannot be 100% sure of their accuracy and the efficiency of the said solutions.
One user says that they connected their Ring device to HomeAssitant and then exported the entities via the HomeKit Integration. The user claims that it has a lot more functionality and capabilities compared to HOOBs.
Moreover, another user claimed that they use Hubitat. According to them, Hubitat connects all ZWave devices such as the Ring Alarm System and all its sensors. They shared that Hubitat has HomeKit integrated which means almost any device added to Hubitat will show up in HomeKit.
Unresponsive Ring Devices
If you are wondering “Why doesn’t my Ring doorbell ring inside my house?” There are a few possible reasons why. You can blame it on the WiFi connection if you have a wireless connection but if you have a wired connection that’s a different story.
If you have a battery powered Ring doorbell/s it might be due to these specific reasons:
Chime Kit is Incompatible
If your Ring doorbell does not ring inside the house, it is possible that it is due to the compatibility issues with your chime kit.
To solve this issue, you need to install a compatible Ring Chime Kit that is designed for your doorbell model.
Issues with the Battery
If you still have issues, it could be due to the low or dead battery. For this you need to charge or replace your battery and check if the Ring doorbell is functioning properly.
WiFi Issues
As I mentioned earlier, you can have WiFi issues if you have a wireless connection, make sure to check your internet connection through the Ring app > Devices Settings. I would recommend installing a Ring Chime Pro Kit if the issues are still consistent.
Incorrect App Setup
If your Ring doorbell is not properly set up in your Ring App, the doorbell might not ring inside. For this make sure to download the Ring App > Create an account > Select “Set up a Device” > Scan the QR code/ MAC ID barcode on the Ring devices > follow the on-screen prompts to connect the device to the WiFi.
Incorrect Wiring
You must ensure your Ring doorbell is correctly wired if not install the devices properly and test out its functionality.
Best HomeKit Ring Bridge supported Devices 2024
01. Ring Smart Lighting
Ring Smart Lighting is a great way to lighting up your yard with Add motion-activated sensor. You can also group Ring Smart Lights together to brighten up a small area. As well as you can make make your whole yard shine whenever one light detects motion.
KEY FEATURES
- Easy installation
- Motion Activated Notification
- Weather resistant
SPECIFICATIONS
- Power Type : 4 D-cell batteries Spotlight
- Lighting : 400 Lumens
- Motion Detection : Adjustable motion detection
- Approximate Battery Life : 1 year under normal use
- Auto Shut-off Time : Adjustable via Ring App


02. Ring Outdoor Smart Plug with Ring Bridge
You can control your existing outdoor lights or appliances from anywhere with this Outdoor Smart Plug. Aslo, you can easily connect Outdoor Smart Plug to Ring Bridge to enable customizable smart controls in the Ring app and sync with other select Ring Smart Lights, Ring doorbells, cameras, and select Alexa-enabled devices.
KEY FEATURES
- Control your existing outdoor lights
- Customizable smart controls in the Ring app
SPECIFICATIONS
- Power input: 120VAC, 60Hz
- Power output: 120 VAC, 60Hz
- Maximum loads across both outlets: 15A; ½ HP motor load, 1875 watt (resistance)
- Operating conditions: -4°F - 122°F (-20°C – 50°C)
03. Ring Video Doorbell Pro 2
Ring Video Doorbell Pro 2 is the best doorbell from Ring. This is an upgraded version of previous one. Ring Doorbell and Apple Home Kit isn't compatible with each other. It has 3D motion detection that lets you customize motion zones so you can detect people at or near your door. Also, you can create your Ring video doorbell HomeKit integration with Enomek solution.
KEY FEATURES
- Two-way talk with audio
- 3D motion detection
- Bird's eye view
SPECIFICATIONS
- Video Resolution: 1536p HD+
- Field of View: 150 degrees
- Power Source: Standard doorbell, Ring plug-in adapter, or Ring hardwired transformer
- Brand: Ring
- Hub Required: No
- Integrations: Alexa
- Connectivity: Wireless
Get your Ring Video Doorbell – Satin Nickel with Ring Chime from Amazon.

Yeah! You can enhance your experience with Ring + HomeKit. Using Ring HomeKit bridge, you can add Ring Alarm with HomeKit, Ring Door View with HomeKit, Ring Floodlight with HomeKit and more.
Now, you know how to add Ring to HomeKit, instead check out How to add Tuya Devices to Apple HomeKit to know more about Tuya HomeKit.
FAQs about Ring and HomeKit
1 Is Ring HomeKit compatible?
The answer is still no. But, you can integrate your Ring devices to Apple HomeKit using Enomek App.
2 Where is HomeKit on my iPhone?
You can access Apple HomeKit via the Home App on your iPhone or iPad, or on your Apple TV.
3 How to add Ring doorbell to HomeKit?
Ring doorbell can be integrated into Apple HomeKit using the Enomek App. Easily download the app by using our installation guide and then, you can enjoy with Ring doorbell HomeKit.
4 Can you add Ring camera to HomeKit?
Yes. You can add any Ring cam to Apple Home with Enomek - HomeKit enabler. It provides easy step-by-step guides to enhance experience with HomeKit.
5 How to add Ring sensor to HomeKit?
Ring sensor can be integrated into HomeKit with the Enomek. You can easily find solution and step guide by downloading the app.
6 How to Connect Ring Alarm with HomeKit?
You can use Enomek to connect Ring Alarm with HomeKit. iOS user can download the app and you can also integrate the Apple Home with any Ring products like Ring Smart Home Lighting.
7 What Smart Home System works with Apple HomeKit?
Ecobee, August, Eufy, Pillips Hue, Lifx, Wemo
8 Does Ring Doorbell work with iPhone?
Yes. You can use Ring Doorbell with iPhone after downloading the Ring App for your iPhone. If your want to add your Ring Doorbell with your HomeKit, you can easily download the Enomek App.
9 How can I use Apple HomeKit with Ring Alarm?
You can do the following things with Ring Alarm HomeKit integration:
- You can arm or disarm the Ring Alarm using the Home App
- Create automation with HomeKit
- When triggered, you can set up your Ring Alarm to turn on lights
- When triggered, you can set up the Ring Alarm to sound
- You can customize the sound
- When the Ring Alarm is triggered, receive HomeKit notification.
10 Is Ring compatible with Matter?
The answer is No. Matter doesn't support Ring yet. We can expect Matter Ring HomeKit integration shortly. So, we're able to use Ring Matter HomeKit devices like Ring Matter supported Cameras, Ring Matter Supported Secure Alarm, Ring Video Doorbell Apple HomeKit etc.
11 Does Ring Alarm work with Apple Home?
No. Ring Alarm Home Kit integration is most requested features from Apple users. but, Ring and Apple Home doesn't compatible technologies yet.
12 What is Scrypted?
Scrypted is an open-source home automation platform which serves as a link between different smart home ecosystems and gadgets, such as Apple's HomeKit. Through plugins, it supports a large variety of devices and protocols, facilitating enhanced automation and integration. The Apple Home app and Siri may now monitor and control non-HomeKit devices thanks to Scrypted, which improves the interoperability of your smart home setup.
13 What Home Hubs work with Ring?
Amazon Echo and Google home both work with the Ring security system. You can even use an app like Enomek to integrate your Ring devices with Apple HomeKit and use the Apple TV 4K as a hub.
14 Does HomePod work with Ring?
Yes! HomePod does work with Ring if you integrate it with Apple HomeKit successfully.