Step by Step Guide to Install Enomek App
Step 1 - Visit https://enomek.com/ page from your iOS device. Enomek currently supports apple iOS only. If you visit the page via a PC or computer, it will show you a QR code to scan from your iPhone / iPad
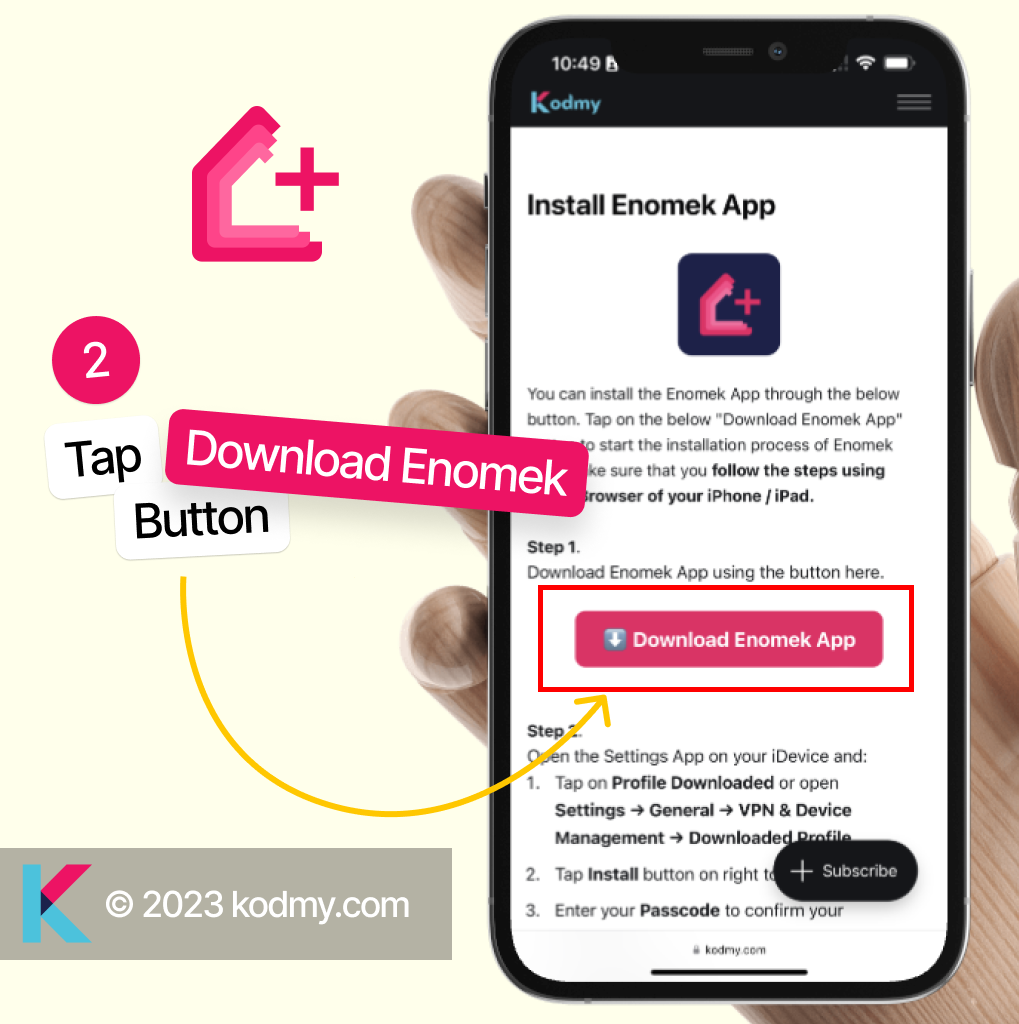
Step 2 - Tap on Download Enomek App button to start downloading process.
Step 3 - Tap allow on the next prompt. This will download a mobile configuration profile to your device.

Step 4 - Go to Settings and complete the Installation
4.1 - Settings > Profile Downloaded
4.2 - Settings > General > VPN & Device Management > Downloaded Profile
Follow one of the above two steps and you will find Enomek latest version (Currently v1.0.0)
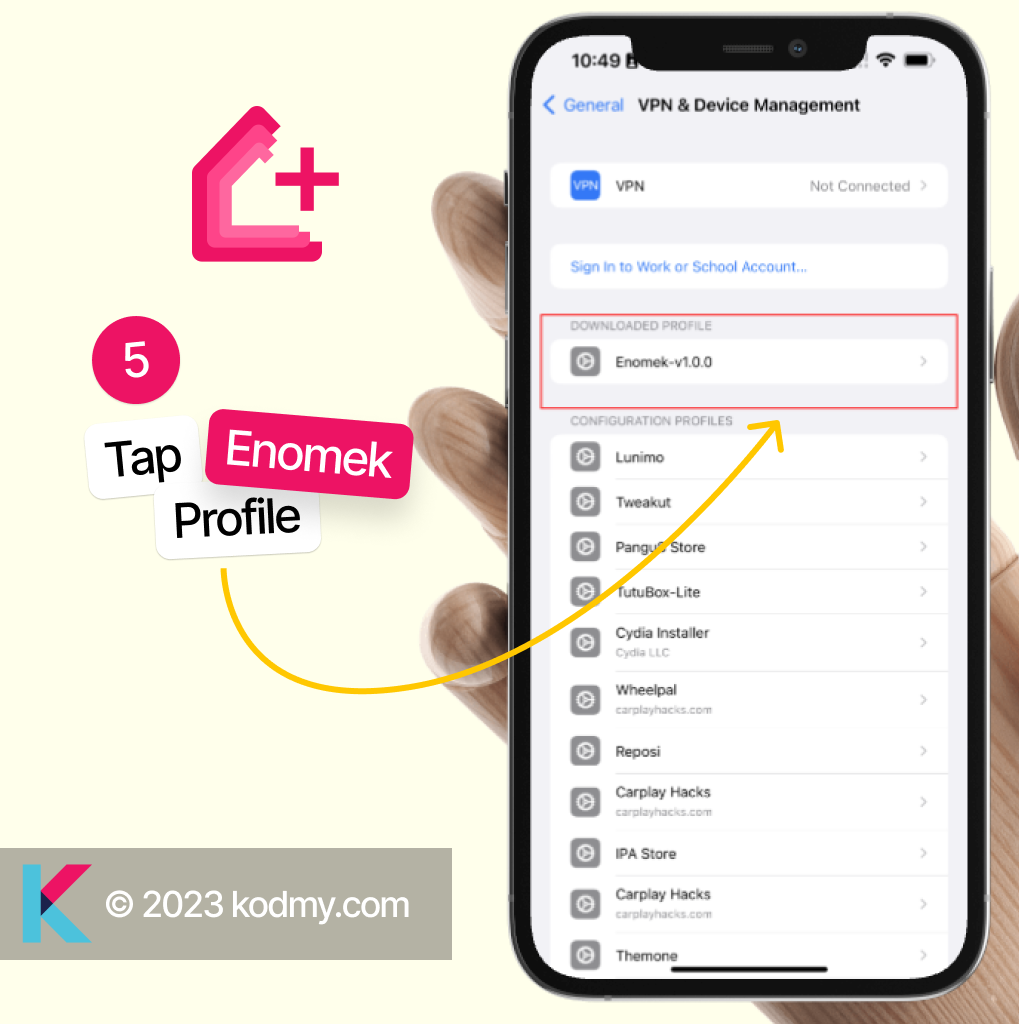
Step 5 - Tap on the downloaded Profile (Enomek-v1.0.0)
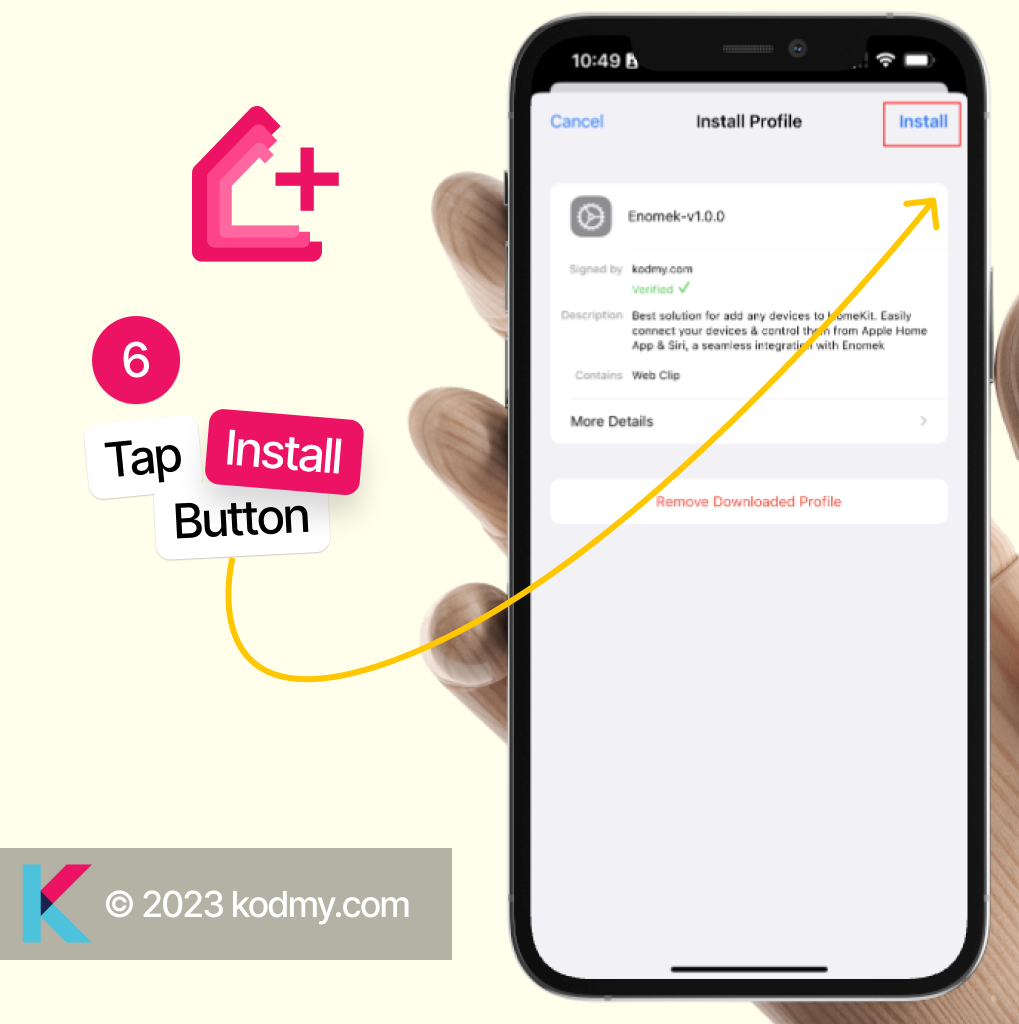
Step 6 - Tap Install on the top Right corner
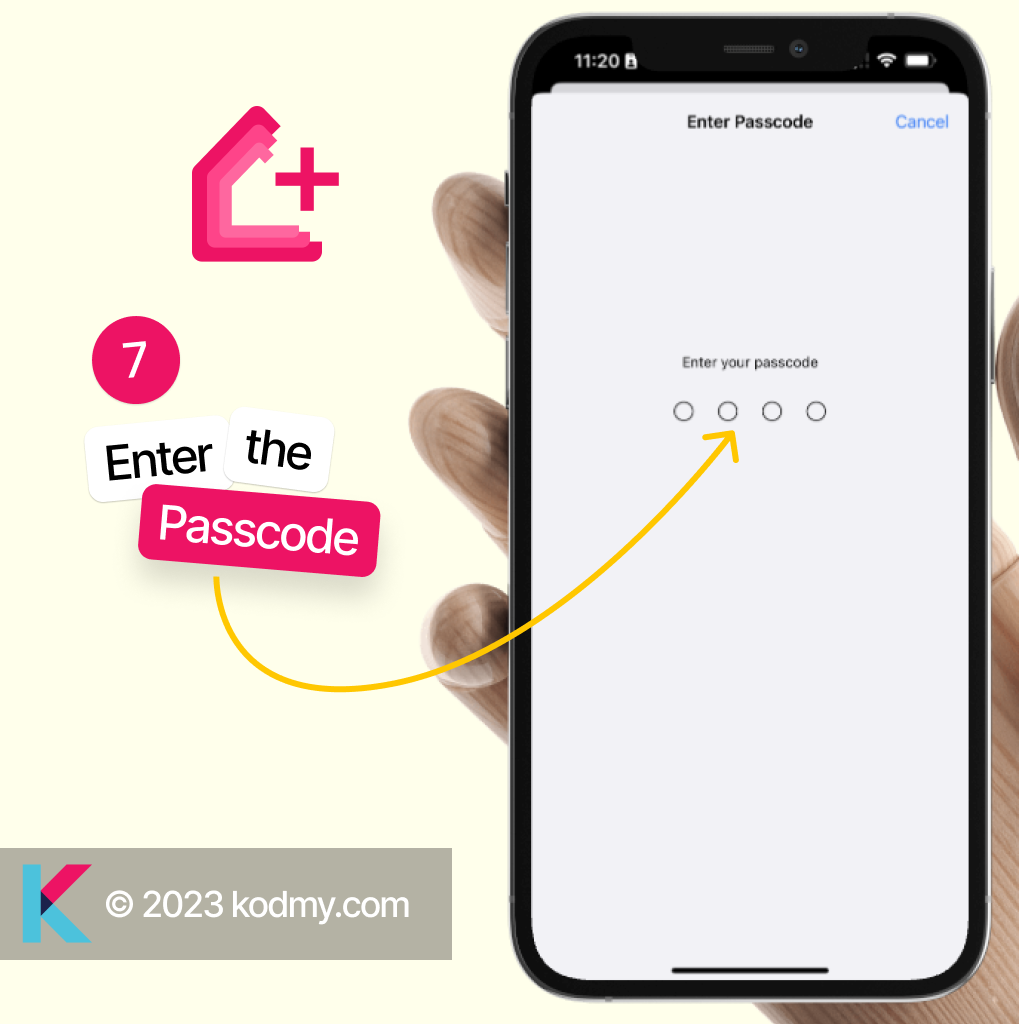
Step 7 - Enter your phone’s four-digit or six-digit passcode. This is required to install Enomek App to your device. You can always remove it
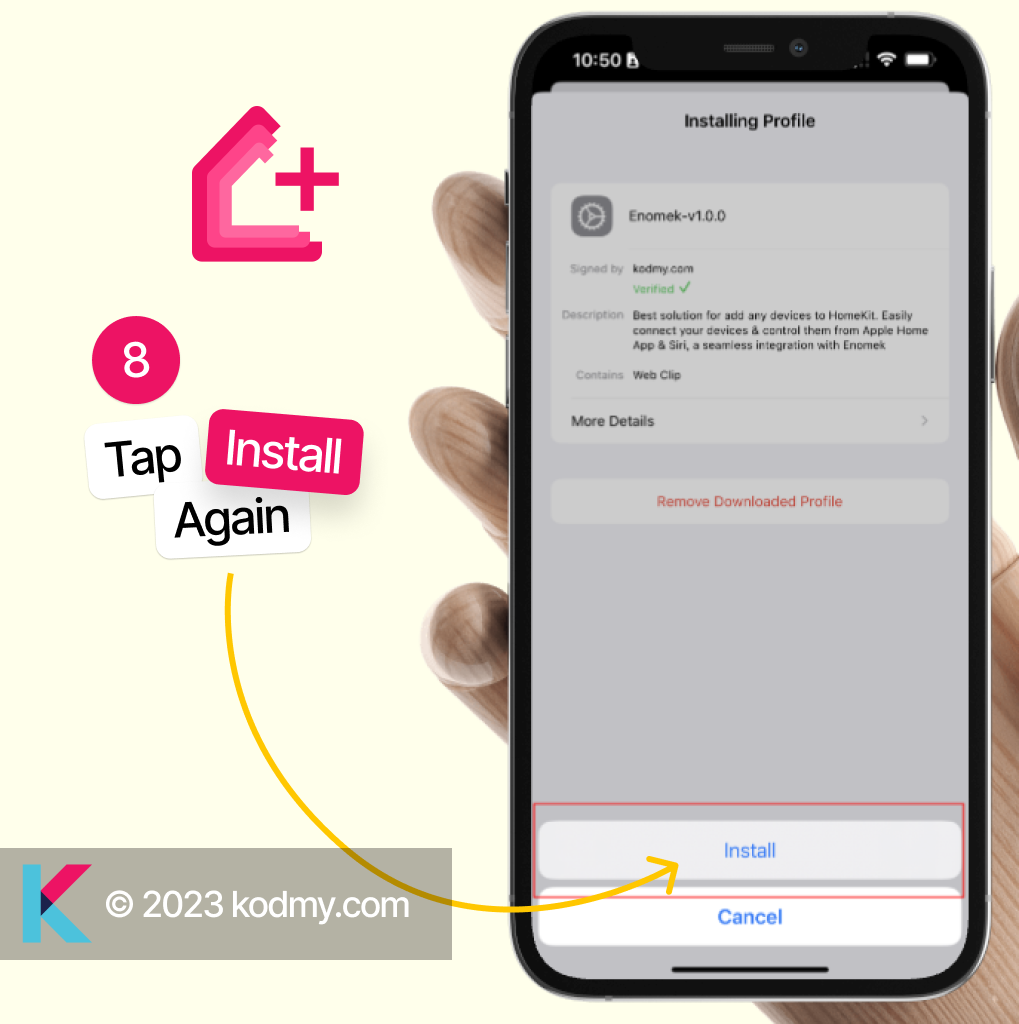
Step 8 - Once Passcode is entered correctly, it will confirm the installation again, just tap on the install to complete the installation.
Step 9 - Tap on Done and you will find Enomek on your iPhone / iPad Screen.

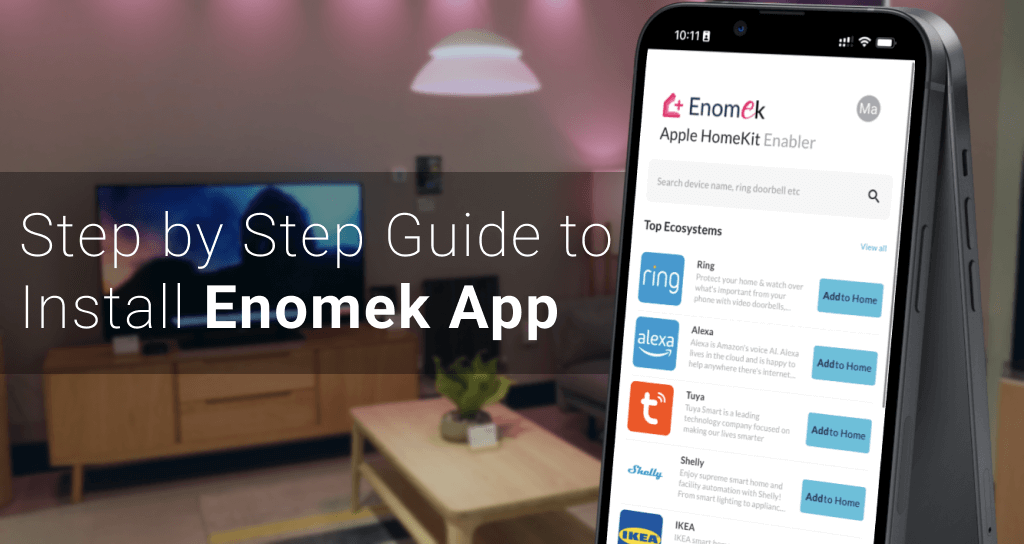
If you want to know more about Enomek, you can check Enomek - Add Any Device to Apple HomeKit article here.