5 ways to add Eufy smart home devices to Apple HomeKit
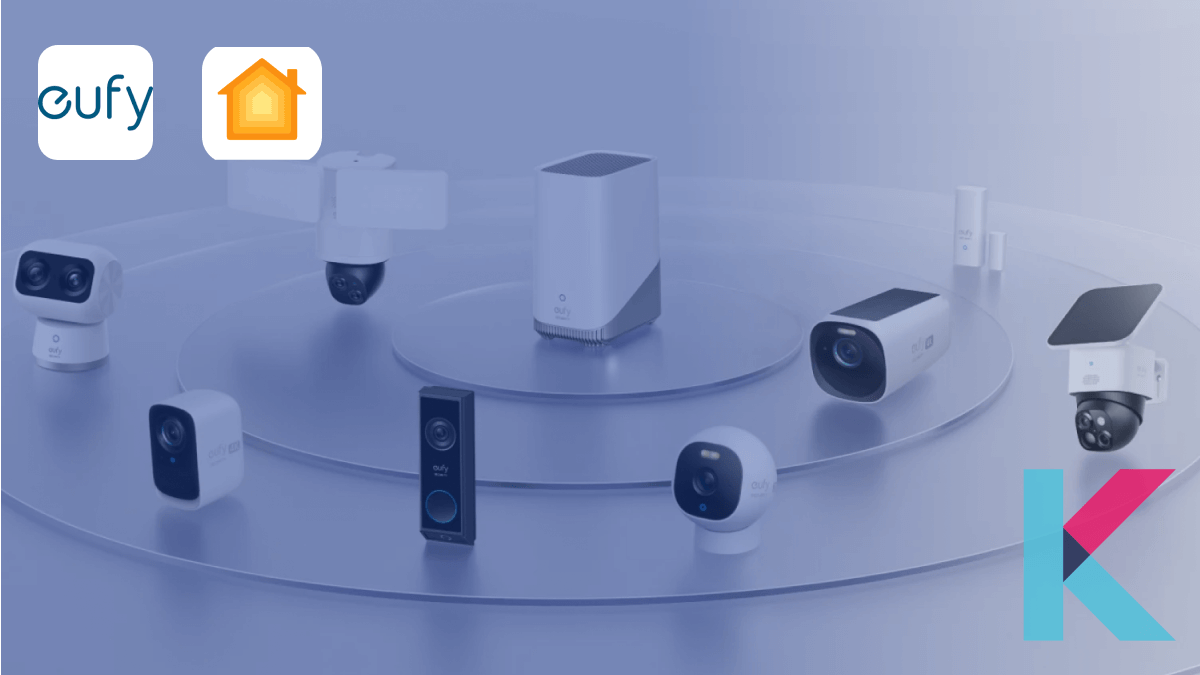
Start benefiting from the security that comes with a connected home by connecting Eufy products to Apple HomeKit. Do you want to show your Eufy smart devices on Apple Home? Control your Eufy devices with Siri or iOS Home App. Continue reading to find out top ways to integrate your Eufy smart devices with HomeKit.
Possible ways to add Eufy devices to HomeKit
There are two main ways to add Eufy devices to HomeKit.
Below is our recommended solutions from app based solution and device based solution.
- Enomek [Our Pick]
- AddToHomeKit
- Athom HomeKit Hub [Affordable Device Solution]
Each of these methods has its own advantages and disadvantages, so it’s important to choose the right one for your home setup.
App based solution
Enomek - HomeKit Enabler [Recommended Solution]
Enomek is one of the best solutions for integrating any smart devices to HomeKit as it provides several solutions with detailed step by step guides. This is the top solution for this, as Enomek works as HomeKit enabler.
Step guide for Enomek App Installation
Why should you download Enomek?
- Simple App based solution
- Provide detailed step by step guides
- Can choose preferred Ecosystem, OS and solutions
- Most affordable solution
- Add any smart home devices to HomeKit
AddToHomeKit
If you're looking an easy way to add your Eufy devices to Apple HomeKit, this is an ideal solution. No more complicated setup process. This simplifies your Homebridge configuration process as it provides a step by step guide.
Homebridge
Homebridge is the most popular technique for adding Eufy devices to HomeKit. It is an open-source piece of software that links your HomeKit-compatible Apple devices with your Eufy devices.
If you have some coding experience, you can quickly set up Homebridge and connect Eufy Smart Home devices to HomeKit.
Let's find the Detail step by step guide to add Eufy devices to Apple HomeKit using Homebridge.
Hardware based solution
Athom HomeKit Hub
You can connect your Eufy devices to Apple HomeKit using the cheapest solution. Athom HomeKit Homebridge Hub is most easiest way to add your non-HomeKit devices to HomeKit. You don't need any technical knowledge to use this.
Why ATHOM HomeKit Homebridge Hub?
- It supports over 2,000 HomeKit plugins, so you can be sure that your devices will be compatible.
- It is easy to set up and use, even if you are not a technical expert.
- It is affordable, making it a great option for budget-minded consumers.
HOOBS
HOOBS (Homebridge Out Of the Box) Solution, is another popular way to add Eufy devices to HomeKit. HOOBS is a plug-and-play method for adding your Eufy devices to HomeKit, in contrast to Homebridge.
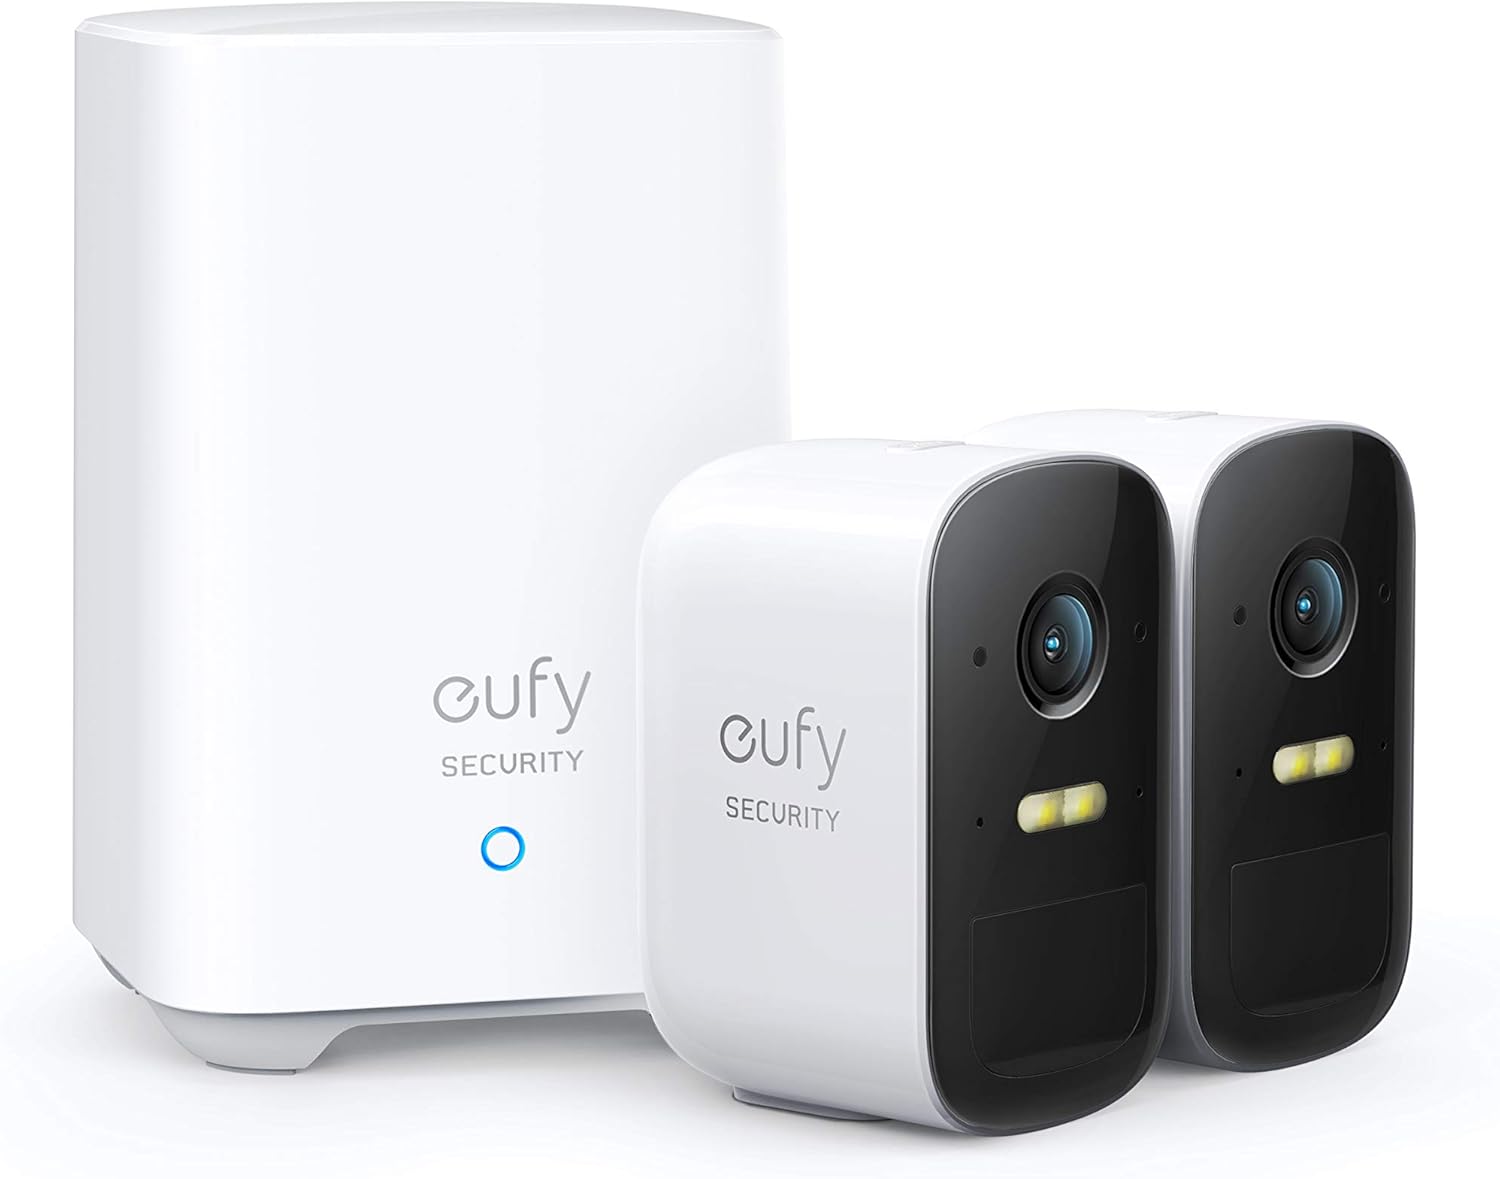
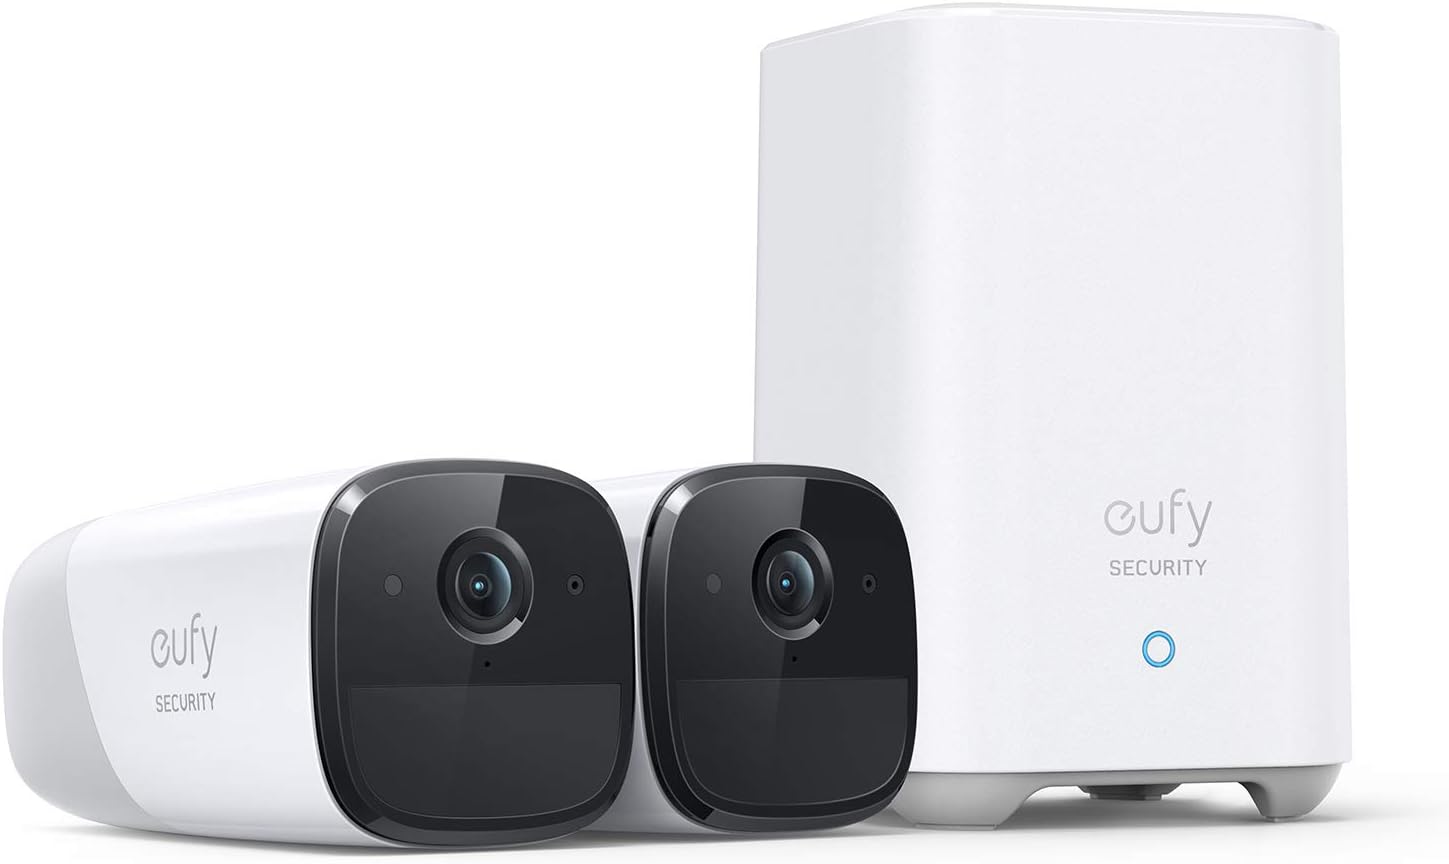
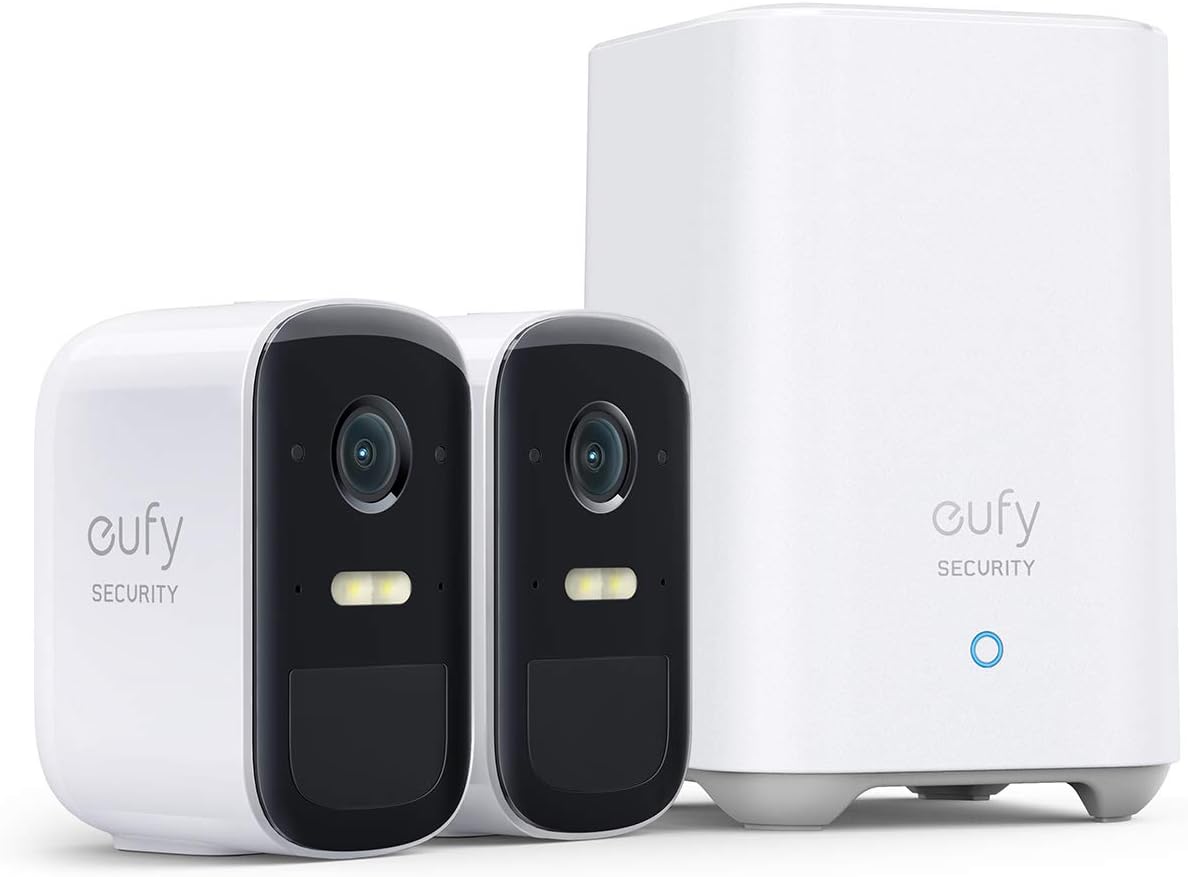
HomeBase
Homebase is a hub device from Eufy. It allows you to connect compatible Eufy security cameras to Apple HomeKit. Homebase connects to your Wi-Fi network and allows you to control your Eufy security cameras with voice commands or through the Home app on your Apple device.
If you have HomeKit compatible Eufy Security cameras, you’ll need to buy this Eufy Homebase Hub.
Get HomeBase 2 from Amazon for $209.99
Be sure to select the best way to set up your home from the five available options. We recommend going with the Simple app solution - Enomek.
Compatibility of Eufy Smart Home Devices with Apple HomeKit
Eufy offers a reliable, convenient, and secure experience of home automation. Sadly, not all Eufy Smart Home products are Apple HomeKit compatible. Nevertheless, none of the Eufy video doorbell models work with Eufy. So, Eufy HomeKit secure video integration is obvious integration those who want to keep an eye on your loved ones.
With select Eufy Camera models working with Apple HomeKit, you can now take control of your home from anywhere in the world with a single tap of your finger. Through the iOS eufy Security App, you can easily add HomeBase 2 and compatible devices to your Apple HomeKit. Let’s see which Eufy camera works with HomeKit.
Are you looking to make your home smarter? Now, you can easily add any smart home device to Apple HomeKit with just a few simple steps!
HomeKit on eufySecurity Devices
Apple’s HomeKit is a powerful platform that allows users to connect various smart home devices together, from lights to doorbells. Which Eufy Cameras Support Homekit? Let's see. Eufy HomeKit support cameras are listed below.
- Eufy Indoor Pan&Tilt 2k (Solo IndoorCam P24)
- Eufy Indoor Cam 2k (Solo IndoorCam C24)
- Eufy Cam 2
- Eufy Cam 2 Pro
- Eufy Cam 2C
- Eufy Cam 2C Pro
Let's take a deeper look at the best Eufy Smart Home devices available in 2023 that are compatible with Apple HomeKit.
Continuous live streaming is possible in eufy smart camera when paired up with the Apple HomeKit. The HomeKit enables users to view the live streaming of the eufy camera feed on their Apple device, as well as record videos and receive motion and sound alerts. The HomeKit also allows users to set up rules for automations and scene settings for their eufy camera.
How to setup HomeKit for HomeKit-enabled Security Devices
You can easily set up HomeKit on eufyCam 2 series and Indoor Cam 2K series. You'll need to have eufy HomeBase 2 to complete the HomeKit setup process. Let's see how to add eufy Cam 2 series to Apple HomeKit.
- Power on your eufy HomeBase.
- Connect your Eufy HomeBase to the internet.
- Find the QR code and set it up. (You can find the QR code at the bottom of your HomeBase 2)
- Connect eufyCam 2/2C/2Pro to HomeBase 2.
Press the sync button (wait until hear a beep sound) > Press the sync / Alarm off button (wait until hare a sound wave) > Then, wait for 30 seconds until you hear a voice "Device was added successfully".
- Go to HomeBase settings > Click on General button > Then, go to HomeKit setup.
- Follow the instructions on the eufySecurity App.
For Indoor Camera 2K/2K Pan & Tilt
To get started:
- Plugin and switch on your camera.
- Scan the QR code found under, or at the back of the camera and add the Camera to your EufySecurity app.
- Go to the settings of the camera and enable the HomeKit feature.
- Follow the required steps to enable this feature on your EufySecurity app.
- To add Eufy to the Home App and then the device will be automatically synced.
- To use the HomeKit secure video, you would need to have an iPhone, or iPod running iOS 13.2 or later, an iPad, Apple TV, or HomePod as a home hub and a subscription for Apple’s cloud services.
eufy Homebase 3 HomeKit Support Update: HomeKit functionality is still not possible with the new Homebase 3.
Why a Eufy Camera doesn't work in HomeKit?
There're some of the common reason.
- Incompatible Camera Model
- Improper Configuration
- Outdated Firmware
- Disconnected Wi-Fi Network
Let’s see how to add Eufy devices to Apple HomeKit using the Homebridge solution.
Step by Step guide to adding Eufy devices to Apple HomeKit using Homebridge
Are you an Apple HomeKit user and interested in using Eufy devices with it? You can easily do that by using HomeBridge, an open source home automation platform. Adding your Eufy smart home devices to Apple HomeKit is a straightforward process. To get started, here are the main steps you need to follow:
Follow these step-by-step guide to know how to add Eufy devices to HomeKit using Homebridge.
Step 1: Install HomeBridge
The first step is to install HomeBridge on your computer. It can be installed on any computer running macOS, Windows, or Linux. To install HomeBridge, you will need to install Node.js. Once Node.js is installed, open your terminal or command prompt and type in “npm install -g homebridge”. This will install HomeBridge on your computer.
Check out our guide to learn how to install Homebridge to make your home smarter and more connected.
Step 3: Install the Eufy Plugin (homebridge-eufy-security)
The next step is to install the Eufy plugin. This plugin will allow HomeBridge to communicate with your Eufy devices.
Via Homebridge UI
You can simply go to the Homebridge and then go to the “Plugins” page. Then, you need to search homebridge-eufy-security and click the “install” button.
Manually
To do this, open your terminal or command prompt and type in “sudo npm i homebridge-eufy-security -g”. This will install the plugin on your computer.
Step 4: Configure the Eufy Plugin
Once the plugin is installed, you will need to configure it. To do this, open the “config.json” file and add the following code to the “platforms” section:
{
"platform": "EufySecurity",
"username": "************",
"password": "************",
}
Note: You will need to replace username and password. The "platform": "EufySecurity" line should remain unchanged.
Here is an example of a Config JSON:
{
"platform": "EufySecurity",
"username": "xxxxxxxxxxxxxxx",
"password": "xxxxxxxxxxxxxxx",
"pollingIntervalMinutes": 30,
"hkHome": 1,
"hkAway": 0,
"hkNight": 3,
"hkOff": 63,
"enableDetailedLogging": 0,
"ignoreStations": [],
"ignoreDevices": [],
"country": "US",
"CameraMaxLivestreamDuration": 30,
}
Step 5: Add Eufy Devices to HomeKit
The final step is to add your Eufy devices to HomeKit. To do this, open the Home app on your iOS device. Tap the “+” button in the top-right corner and select “Add Accessory”. You will then be asked to scan the QR code or enter the code for your Eufy device.
Once the device is added, it will appear in the Home app and you will be able to control it with HomeKit. Conclusion Adding Eufy devices to HomeKit using HomeBridge is a fairly simple process.
With just a few steps, you can easily add your Eufy devices to HomeKit and control them with your iOS device. HomeBridge is a great way to bridge the gap between various home automation systems and Apple HomeKit.
Step by Step guide to adding Eufy devices to Apple HomeKit using HOOBS
With HOOBS, the process of adding Eufy devices to Apple HomeKit is easy and straightforward. This step-by-step guide will explain how to add Eufy devices to Apple HomeKit using HOOBS.
- Download the HOOBS app from the App Store and create an account.
- Connect the HOOBS hub to your Wi-Fi network and power source.
- Connect the HOOBS box to a power outlet and your router with the included connector and micro USB connection. The "HOOBS" Wi-Fi network can then be found using your iPhone. When you successfully join, you will be prompted to select your Wi-Fi network and enter its passphrase.
- Open a browser and go to http://hoobs.local. After that, you should be able to create an administrator account and password on the HOOBS startup screen.
- Pair HOOBS with HomeKit:
- To add your new bridge to HomeKit before adding the Ring plugin, you will need to go to the Apple Home App. Select the 'Add Accessory' option and scan the QR code found on the dashboard with your phone camera.
- To make sure the bridge has been added correctly, go to the Home icon in the top left, scroll down to Home settings, and open the Hubs and Bridges section. There you can assign your HOOBS device to a room.
- Install Eufy plugin:
Open the HOOBS dashboard after setting up HomeKit. Tap the Plugin icon on the toolbar. Enter "Eufy" after typing it into the search bar. Click the install button with the HOOBS-certified emblem above it to install the plugin. The plugin can be seen in the plugin area once the procedure is finished.
- Add compatible Eufy devices to the HOOBS app:
Open the Home app on your iPhone or iPad and tap the “Add Accessory” button.
- Scan the 8-digit HomeKit code or QR code included with the Eufy device.
- Enter the HomeKit code into the Home app or use the camera to scan the QR code.
- Wait for the Home app to detect the device and add it to your HomeKit setup.
- Name the device and assign it to a room.
- Set up automations and scenes for the device in the Home app.
- Start controlling the Eufy device using Siri or the Home app.
Step by Step guide to adding Eufy devices to Apple HomeKit using Raspberry Pi
- Set up your Raspberry Pi:
You must first configure your Raspberry Pi. This includes installing the most recent Raspbian OS version as well as attaching the power supply, Ethernet cable, and keyboard.
- Install Homebridge:
Installing Homebridge on your Raspberry Pi is the next step. This is a compact Node.js server that serves as a bridge between Apple HomeKit and Eufy devices. The command below can be used to install Homebridge:
sudo npm install -g homebridge - Configure Homebridge:
You must set up Homebridge after installation so that it can communicate with your Eufy devices. Setting up a configuration file that instructs Homebridge on which devices to manage and how to get to them is necessary for this. Here are comprehensive directions for setting up your configuration file.
- Install Eufy Homebridge Plugin:
Installing the Eufy Homebridge Plugin is necessary after configuring Homebridge. With the aid of this plugin, Homebridge can talk to Eufy gadgets. Run the following command to install the plugin:
sudo npm install -g homebridge-eufy - Add Eufy Devices to Homebridge:
Your Eufy devices must now be added to Homebridge. To add the Eufy devices you want to control, you must change the Homebridge configuration file. Here are comprehensive directions for adding devices to Homebridge.
- Link Homebridge to Apple HomeKit:
Finally, you need to link Homebridge to Apple HomeKit. This requires generating a code that you can use to pair your Raspberry Pi with HomeKit. You can generate this code with the following command:
homebridge -U (username)
Once you have generated the code, you can link Homebridge to HomeKit using the Apple Home app. And that’s it! Following these steps should allow you to add Eufy devices to Apple HomeKit using Raspberry Pi.
We have now learned how to set up Eufy with Apple HomeKit using simple methods. As mentioned previously, there are a few security cameras that are compatible with Apple HomeKit. So, let's take a look at how to set up these cameras with HomeKit.
Troubleshooting Issues with Eufy and Apple HomeKit Integration
First, make sure that your device is compatible with HomeKit. You can check the compatibility of your device through the Eufy website or in the user manual that came with your device.
Also, you should ensure that you have the latest firmware updates installed on your device and that your HomeKit setup is in working order. If all of these basics have been taken care of, then you should follow the steps below to troubleshoot any issues you are having with your Eufy and Apple HomeKit integration.
- Ensure that the Eufy device is powered on and that it is connected to the same Wi-Fi network as the HomeKit device.
- Check to make sure that Bluetooth is enabled on the HomeKit device.
- Check the Eufy app to ensure that the device is properly connected and that all settings are correct.
- Ensure that the HomeKit device is connected to an Apple ID with two-factor authentication enabled.
- If the issue persists, try resetting the Eufy device and reconnecting it to the Wi-Fi network and HomeKit device.
Best Eufy smart home devices 2024
Eufy has something for every home from robotic vacuums and security cameras to indoor air purifiers and smart doorbells. Here are some of the best Eufy smart home devices for 2024.
01. Eufy Motion Sensor
The Eufy Motion Sensor is a motion detection device that can be used for a variety of purposes (home security, energy efficiency, and automation). It is designed to detect motion up to 16 feet away. It can be connected to other Eufy devices or compatible third-party devices.
It is powered by two AAA batteries and is small enough to fit in tight spaces. It can be used in conjunction with Eufy's app to customize settings and receive notifications when motion is detected. It is also compatible with Amazon Alexa, Google Assistant, and IFTTT services.


02. Eufy security HomeBase 2
eufy Security HomeBase 2 is a home security system designed by Eufy, a company that specializes in home security and automation products. The HomeBase 2 is a central hub for the Eufy security system that connects to a variety of Eufy security devices, including cameras, door/window sensors, motion detectors, and more.
It provides real-time alerts and notifications, as well as home automation capabilities. HomeBase 2 is designed to be easy to install and use, and requires no monthly fees.
Hurry up! Get Eufy security HomeBase 2 from Amazon

03. EufyCam 2C
The EufyCam 2C is a wireless security camera with a built-in spotlight, 2K resolution and wide-angle lens. It is equipped with an infrared night vision, motion detection, and sound detection. The EufyCam 2C is also compatible with Apple HomeKit Secure Video, allowing you to securely monitor your home and receive notifications when the camera detects motion or sound.
Secure Your Home with EufyCam 2C: All-in-One Home Security Solutions - Get your EufyCam 2C now.
04. EufyCam 2 Pro
The EufyCam 2 Pro is a security camera system that offers advanced features to protect your home. It comes with two cameras that can be placed indoors or outdoors, each with a 140-degree field of view.
The cameras have night vision and two-way audio, so you can talk to whoever is on the other end. Additionally, the EufyCam 2 Pro is compatible with Google Assistant and Amazon Alexa, so you can control it with voice commands.
Secure your home, inside and out with EufyCam 2 Pro - Get EufyCam 2 Pro from Amazon.
EufyCam 2C Pro
The EufyCam 2C Pro is a security camera designed for home and business use. It features 1080p video resolution, night vision, two-way audio, motion and sound detection, and a weatherproof construction.
The camera also comes with a base station, a magnetic mount, and a one-year warranty. The EufyCam 2C Pro is a great choice for those looking for a reliable, easy-to-use security camera.
Secure Your Home with EufyCam 2C Pro - Get you EufyCam 2C Pro from Amazon for $289.88
Eufy Indoor Cam 2K
The Eufy 2K Indoor Pan and Tilt Cam has all the features of the Eufy 2K Cam, plus the added ability to pan and tilt. With the app on your device, you can easily scan an entire room. This camera also comes with a motion tracking feature that allows it to follow anything moving in the room.
Solo IndoorCam P24 Solo
IndoorCam P24 is a home security camera designed for indoor use. It features a 24-megapixel resolution, a wide-angle lens, and two-way audio. It also has night vision and motion detection capabilities, as well as an integrated siren.
The Solo IndoorCam P24 comes with a mobile app that allows users to view footage and receive notifications. It also includes cloud storage for up to seven days of footage.
Stay connected with the ones you love - get your Solo IndoorCam P24 today

Conclusion
Adding Eufy smart home devices to Apple HomeKit can be done with Enomek, AthomBridge, Homebridge, HOOBS and Homebase. There are few Eufy cameras compatible with Apple HomeKit. For devices that are incompatible with HomeKit, our recommended solution is Enomek. For Eufy cameras that are compatible with HomeKit, we recommend the Homebase hub.
FAQs about Eufy and HomeKit
1 Does EUFY work with HomeKit?
Some Eufy smart devices work with HomeKit, but some need to have bridging solutions to work with HomeKit. If you prefer to go with a simple app solution, you can choose Enomek to add any smart home devices to HomeKit.
2 How do I connect EUFY to HomeKit?
You can easily connect your Eufy devices to Apple HomeKit with the Enomek solution. Also, you can use a simple plug-and-play solution like Athom bridge.
3 What is the best EUFY camera for HomeKit?
When we consider affordability, we recommend going with the Eufy Solo IndoorCam C24. It is also compatible with Apple HomeKit.
4 Is eufyCam 3 compatible with Apple HomeKit?
The answer is No. EufyCam 3 isn't compatible with HomeKit. But, you can add your Eufy camera to HomeKit with a simple third-party solution like Enomek.
5 Do eufy security cameras work with Matter?
Eufy hasn't announced Matter support yet. But, it will be compatible with the Matter protocol in the near future.