Homebridge - Way to add any device to HomeKit

HomeKit is a compact home automation solution with a combination of the Apple ecosystem and decent third-party software apps. The role of Homebridge is most important when it comes to HomeKit. Hence, it gives a way to connect those devices that may never add official support.
What is Homebridge?
In simple terms, Homebridge is a bridge between smart home devices and the Apple Homekit. It is a lightweight Node JS server. We can integrate our smart home devices using Homebridge that don’t support Apple HomeKit.
- Control your Homebridge HomeKit accessories
- Set up automation using your iPhone, Apple iWatch, iPad, and Mac.
- Create secure control and powerful automation with addition to the home hub (HomePod, Apple TV, or iPad) even when you're not at home.
Homebridge provides compatibility support for HomeKit. Do you want to find the best Homebridge compatible devices? Let's find.
Although Apple HomeKit provides both some powerful automation and voice control, it is limited to hardware support. For instance, you are unable to find any Ring or Nest support for the platform.
Also, they aren't compatible with other big brands like Sons, Arlo, and a lot more. That’s why Homebridge is very important to us. It solves all problems easily.
The official Reddit community and Homebridge Discord server are two of the Homekit communities. You can discuss it and ask for help using their community. Also, these communities can be found on both Reddit and Discord. There are several Homebridge apps available such as Homemanger, Eve app, and more.
Benefits of Using Homebridge
01. Integration with Apple's HomeKit ecosystem
02. Compatibility with non-HomeKit devices
03. Customizable
04. Low-cost solution
05. Active community
Limitation of Homebridge
Due to the HomeKit limit, one bridge is able to expose only 150 accessories. However, you can run your plugins as a Child Bridge or run Multiple Homebridge Instances.
An accessory has been added to the Home app once, changing its name through Homebridge won't be automatically reproduced in iOS. You must have changed it through the Home app as well.
How does Homebridge work?
Homebridge acts as a bridge between non-supported smart home devices and Apple HomeKit. It converts APIs from Apple HomeKit into smart device comprehensible API and vice versa. It also controls by emulating the iOS HomeKit API using plugins.
Furthermore, they have user-contributed components. Well-known brands have their plugin to add into the Homebridge such as WeMo, Demotics, and Netatmo. Both plugins and Homebridge can be configured as global NPM modules from a command-line prompt. They are also friendly with both the Raspberry Pi system and Linux.
If you want to make everything HomeKit compatible, you can add Homebridge to your device. Let's find how to install Homebridge on your Mac/PC →
Step by Step Guide to add any devices to Apple HomeKit using Homebridge
Before connecting your smart device to Apple HomeKit, you need to have a computer that works with Homebridge. Here’re the options for installing Homebridge.
- Install Homebridge on macOS
- Install Homebridge on Debian or Ubuntu Linux
- Install Homebridge on Windows 10
Install Homebridge on macOS
Before you begin – What you’ll need
- A computer that runs the latest version of OS.
-
Terminal app.
You need to have access to the terminal so you can copy and paste commands from this guide.
- You have to make sure that your computer doesn’t yet have Homebridge installed. If you installed Homebridge previously, you want to remove any existing installation.
- Apple Silicon / M1 devices.
Step 1: Install Node.js
-
Install Node.js.
You’ll need to install Node.js before installing Homebridge. Homebridge uses Node.js for running Javascript apps on a local machine.
-
Install other development environments.
Note: Additional Homebridge plugins work properly with these development environments such as C++ or Python.
-
Test Node.js installation.
Once Node.js is installed, test whether it works or not from a terminal window using the following commands:
node -v: To check the installed Node.js version.npm -v: To check the installed npm (Node Package Manager) version.
#test node.js is working
user@local:~# node -v
v16.13.1
#test npm is working
user@local:~# npm -v
8.7.0
Step 2: Install Homebridge and Homebridge UI
Run the following commands on the terminal window or over SSH to install Homebridge with the web interface components.
#install homebridge
user@local:~# sudo npm install -g --unsafe-perm homebridge homebridge-config-ui-xThis may take some time to install Homebridge as npm will fetch and install a few dependencies needed.
Step 3: Start Homebridge service
Once Homebridge is installed, you can start the Homebridge service. The first run takes a bit longer time as it generates its initial configuration.
#start homebridge service
user@local:~# sudo hb-service install –-user homebridgeThis command sets up Homebridge and the Homebridge UI as a service.
config.json will automatically create under ~/.homebridge if it does not already exist.
Step 4: Log in to the Homebridge UI
Once the installation is completed, you can access the web interface using the listed IP addresses.
Log into the web interface using the default username and password (both admin).
If Homebridge is installed and set up to run correctly, the Homebridge UI web interface will allow you to:
- Install Plugins
- Remove Plugins
- Update Plugins
- Modify the Homebridge config.json
- Manage aspect of your Homebridge service
Install Homebridge on Windows 10
Before you begin – What you’ll need
- A computer running an update-to-date version of Windows 10
- An account with administrator privilege
Step 1: Install Node.js
Install Node.js and other development environments such as C++ or Python before adding Homebridge to your device.
- Download the newest version of Node.js using:
- Node.js v16.14.0 64-bit
- Node.js v16.14.0 32-bit
- Check whether Node.js works:
#test npm is working
user@local:~# npm -v
8.7.0
Step 2: Install Homebridge and Homebridge UI
Run the following commands on the administrator Node.js command prompt to install Homebridge with the web interface components.
npm install -g --unsafe-perm homebridge homebridge-config-ui-xStep 3: Start Homebridge service
To install Homebridge as a service, use the following commands from an administrator command prompt.
hb-service installOnce Homebridge is installed as a service, ensure you give Node.js permissions.
config.json will automatically create under ~/.homebridge if it does not already exist.
Step 4: Log in to the Homebridge UI
With Homebridge UI, you can log in using the command line or using Homebridge User Interface. See how to log in to the Homebridge UI.
Using the command line:
You can view your pairing code from a Node.js command prompt using this command:
If you want to edit your config.json, open the $HOME/.homebridge/config.json file in a code editor. If you have made any changes to config.json, restart Homebridge using the following commands:
hb-service stop
hb-service start
Install Homebridge on Debian or Ubuntu Linux
Before you begin – What you’ll need
- A Debian, Ubuntu, or Raspbian Linux machine
- Terminal app – You need to have access to the terminal. So, you can copy and paste commands from this guide
- You have to make sure that doesn’t yet have Homebridge (If you installed Homebridge previously, you want to remove any existing installation)
Step 1: Install Node.js
Now, you have to install the latest version of Node.js and additional dependencies (use following commands):
# setup repo
curl -sL https://deb.nodesource.com/setup_16.x | sudo bash -
# install Node.js
sudo apt-get install -y nodejs gcc g++ make python net-tools# test node is working
node -vStep 2: Install Homebridge and Homebridge UI
Next, you need to install Homebridge with the web interface components. Open the administrator Node.js command prompt and run the following commands:
sudo npm install -g --unsafe-perm homebridge homebridge-config-ui-xStep 3: Start Homebridge service
Now, you can start the Homebridge service by using following command from your terminal:
sudo hb-service install --user homebridgeNext, you need to make sure you grant Node.js permissions to access your private network.
config.json will automatically create under /var/lib/homebridge if it does not already exist
Step 4: Log in to the Homebridge UI
Let's see how to login to the Homebridge UI
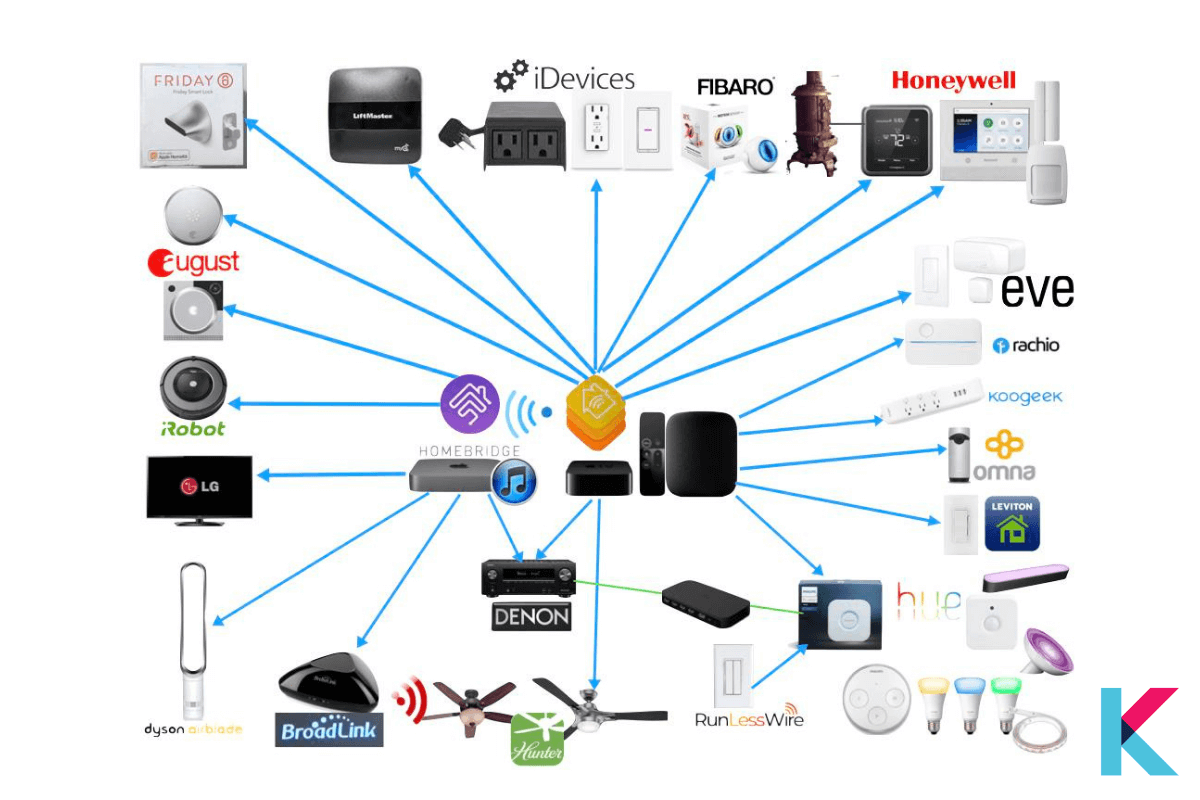
Homebridge plugins
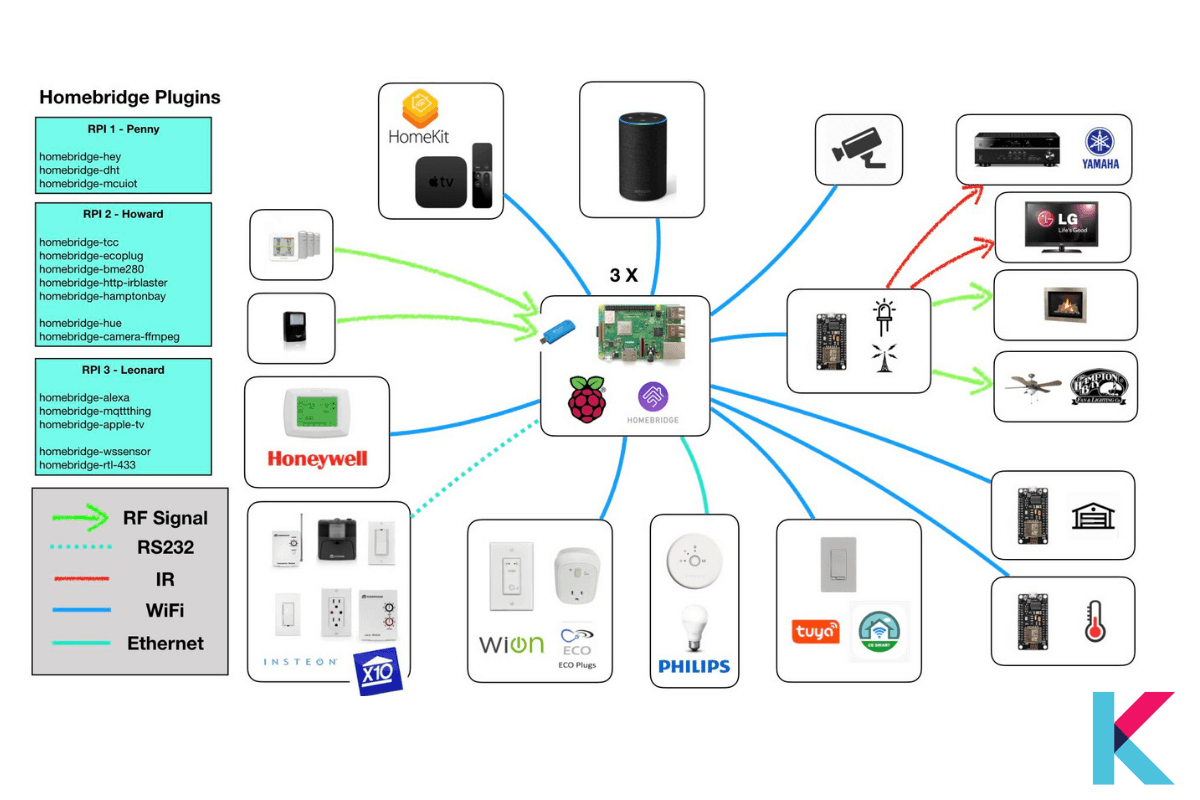
Homebridge offers extensible device support through its plugins. These plugins are established by the 3rd party developers. So, you need to install each plugin into your Homebridge and configure it.
There are many smart home plugins available to make automation easier than ever. Homebridge can integrate with your smart home devices that already use. It controls devices via plugins installed on the Homebridge web UI. Also, you can connect your Homebridge to your smartphone using Homebridge plugins.
Some of the most popular Homebridge Github plugins and HomeBridge devices include Ring Nest, TP-Link Kasa Smart Home, Hue / deCONZ (Zigbee), Belkin, Wemo, myQ and UniFi Protect.
Homebridge Google Home Mini
The Google Smart Home plugin is the best option for you if you choose to use Google Home instead of Alexa. It enables smart device control from any Google Home-enabled smart speaker. This plugin does necessitate running Homebridge in insecure mode.
See "Enabling Accessory Control" on the Homebridge UI Github page for further information on how to set Homebridge to insecure mode.
Homebridge Alexa
Homebridge Alexa plugin allows Amazon Alexa to operate Homebridge devices. It supports you to integrate all Alexa smart speakers and uses a skill-based approach.
HomeBridge Hue
You can connect Philips Hue smart lights to Apple HomeKit using this plugin. Also, you can control your Hue lights using Siri or the Home app, and you can automate them using HomeKit scenes and automations.
HomeBridge Nest
If you want to control Alexa-enabled devices using HomeKit, you can use this plugin to use Siri to control your Alexa devices, and you can include Alexa devices in your HomeKit scenes and automations.
Homebridge Ring Plugin
You can integrate your Ring smart home devices with Apple's HomeKit ecosystem using Ring HomeBridge Plugin. You can also control your Ring devices, such as video doorbells, security cameras, and smart lights, using Siri or the Home app on your iPhone, iPad, or Mac.
Homebridge Eufy Plugin
With Eufy HomeBridge Plugin integrate Eufy smart home devices with Apple's HomeKit ecosystem and control your Eufy devices, such as smart lights, cameras, and video doorbells, using Siri or the Home app on your iPhone, iPad, or Mac.
Meross
Meross is only now beginning to accept HomeKit control, so you'll need Homebridge for older Meross products. One of the most popular alternatives to the Chamberlain MyQ G-0301 is Meross' MSG100 garage door opener. This plugin allows you to control the MSG100 and other Meross smart devices.
Both the IP address of your Meross device and the Meross app is required for this plugin to function properly.
Tuya Homebridge Plugin
It is a custom plugin for Tuya devices in HomeKit. It is based on the Tuya Open API. The Tuya Developer Team is officially maintaining this plugin.
There are several types of Tuya devices. It can support this plugin such as lights, outlet, Smoke Sensor, Switch, Heater, Fan, and Garage Door.
If you want to control Tuya Smart Devices without internet connection, check out How to control Tuya Smart Devices locally.
All supported devices are mapped in this converter technically. You have to implement a new HomeKit Device class to enable a new device and register it. Also, it supports Philips, IKEA, Xiami, Tuya Innr, LinkIn devices.
It can monitor HomeKit input and output devices connected to the Pi’s GPIO pins such as buttons, contact sensors, Relays, Servo mortars, etc. It is not like other Raspberry Pi plugins. Also, it can run any of the regular Homebridge setups.
Control your smart devices
Firstly, you want to power Homebridge devices and setup for your iPhone, iPad, Apple Watch, and Mac. It is needed to utilize the Eve for HomeKit, Apple Home App, or any other third-party HomeKit software to regulate your computer.
Also, you can control your accessories using your voice through Siri voice assistant once your devices have been added to HomeKit. Siri is a cloud service. So, iOS takes some time to synchronize your device figures with iCloud.
“Siri, Turn on the fan in the dining room”
“Siri, Set the temperature to 50 degrees”
“Siri, Are the lights off upstairs?”
If you're more into Apple HomeKit and own Ring Devices, you may find How to add Ring Devices with Apple HomeKit.
Why Homebridge is needed?
When we consider automation and voice management, Apple HomeKit is a great device. However, it has several limitations when considering hardware support. For instance, there isn’t Nest support or Sons compatibility on the network. It serves as a link between the computer and the HomeKit. Also, it can operate on any machine.
Homebridge acts as a bridge between non HomeKit compatible devices and HomeKit. So, you can easily add any of your devices to Apple HomeKit. Also, you can use Athom Bridge or HOOBS to do this. It is the best alternative for Homebridge.
Simple user interface
It has easy to use user interface to control your HomeBridge Plugin. You can easily install and configure Homebridge plugins. Aslo, you can monitor your Homebridge server, view and control your Hombridge accessories, and backup and restore your Homebridge instance.
How to add Homebridge to your iPhone?
First, you need to open up the Home app on an iOS device with your configuration. Then select plus and add an accessory. After that, tap can’t scan or don’t have a Code. On the next page, you can select your Homebridge.
It will display that it is an Uncertified Accessory. You have to select Add anyway and manually enter the HomeKit setup code. You can find your Homebridge devices and add them to your home.
For instance, You get a switch that turns Echo mode off and on with Nest Thermostat. Also, this switch can set if you are at home or not. While your Homebridge server is running, all of the devices you add will appear.
Where you added the hub once your devices are in HomeKit. Your devices will appear in the room by default. You can easily control devices and move devices into any room just like other devices in HomeKit. So, you can easily add Homebridge to your iPhone 12, 13 , 14 or 15.
How to connect incompatible accessories to Homekit?
Have you ever tried to connect your favourite accessories to Homekit? Here are some options that may be able to help you.
You can be able to bring your Nest thermostat or Ring doorbell into the Home app with proper hardware or software. You can put them right alongside the best Homekit cameras, door locks, and many more. There are few things to connect incompatible devices to your Homekit.
Before getting start
Before you get started, there are a few things to consider. Homekit-enabled products go through rounds of difficult testing and adhere to strict security guidelines.
It is different for non-HomeKit-enabled products. If you have decided to follow this option, you can proceed with attention and be mindful of what you select to install in your home.
Also, some advanced configuration might be required. Sometimes, you feel uncomfortable with plugging in some code here. You may want to stick to the best HomeKit accessories with a few clicks.
Adding Nest accessories
Starling Home Hub is the best option for you to start with Nest Thermostat. It is a small hub device that bridges select Nest devices to HomeKit over a simple browser interface. This Starling Home Hub can support several Nest accessories such as Google Nest Thermostat, Nest Yale lock, Nest Protect, Nest Learning Thermostat, and Nest Cam Outdoor.
It takes a few minutes to set up the starling Home Hub with the bulk of the process. Then you can log in to your account. Next, you want to add the hub to your HomeKit home the same way that you set up your HomeKit accessories by scanning a QR code through the Home app.
SmartThing, Ring, and more
Homebridge is one of the alternatives for connecting your smart accessories with your HomeKit. It is with a fully-assembled Raspberry Pi and server pre-installed microSD card. Also, you are able to connect a variety of popular non-HomeKit-enabled accessories to your Homekit through the plugin. It supports smart home accessories manufacturers such as Ring, SmartThing, Wink, Nest, and MyQ.
Also, it only requires a few clicks to install and configure a plugin. Some of the plugins may not work properly since HOOBS runs an improved version of Homebridge.
Running your server
It is easy to set up your server. Also, the newest version of Homebridge is now available freely. It also can run on different platforms such as Windows, Linux, and macOS. It needs Node.js and a few terminal commands to install on this platform. After all of the steps, you need to install plugins and manage your smart home via a clean web interface.
The Homebridge team offers a smart image file. Also, you can flash to a microSD directly for use with Raspberry. After you flash your Homebridge to your memory card, you are able to boot it into Homebridge. It is necessary to have a local IP address through your browser.
Homebridge vs. Home Assistant
Both Homebridge and Home Assistant are open source platforms that allows you to control your smart home devices from a single interface. The installation and setup process of these two requires you to have some technical knowledge.
Home Assistant has a user friendly user interface and Homebridge doesn't have native user interface. You can manage homebridge via web interface or a command line interface. Also, both support a wide range of smart home devices and voice control via Amazon Alexa and Google Assistant.
Home Assistant is compatible with many platforms such as iOS, Android, Windows, macOS, SmartThings and Alexa. However, Homebridge isn't compatible with other platforms and is primarily design to work with Apple HomeKit.
Both have active community support and strong security features.
Other alternatives to Homebridge:
- Enomek
- Athom Bridge
- HOOBS
- Matter protocol
How to install Homebridge?
You can add any Smart home Devices to Apple HomeKit using Homebridge. Before adding any smart devices you need to install Homebridge on your device. There're few options for installing Homebridge.
Homebridge Raspberry Pi
Raspberry Pi is a low cost and credit card size computer. Homebridge also provides pre-made Rasberry Pi image. Also, you can easily flash Raspberryi Pi image here.
Install Homebridge your existing system:
- Install Homebridge on macOS
- Install Homebridge on Debian or Ubuntu Linux
- Install Homebridge on Windows 10
- Install Homebridge on Raspberry Pi OS
You can learn on how to install Homebridge to your devices using our add any Smart Home Devices to Apple HomeKit article.
How to Uninstall Homebridge?
-
If you want to remove your Homebridge service, run the following command:
sudo hb-service uninstall -
After that, you can remove Homebridge and the Homebridge UI by running this command:
sudo npm uninstall -g homebridge homebridge-config-ui-x
Best Homebridge compatible product
Many smart home accessories don’t work with Apple HomeKit. However, you can easily make work those accessories with Apple Homekit. So, let's see what the Homebridge devices are.
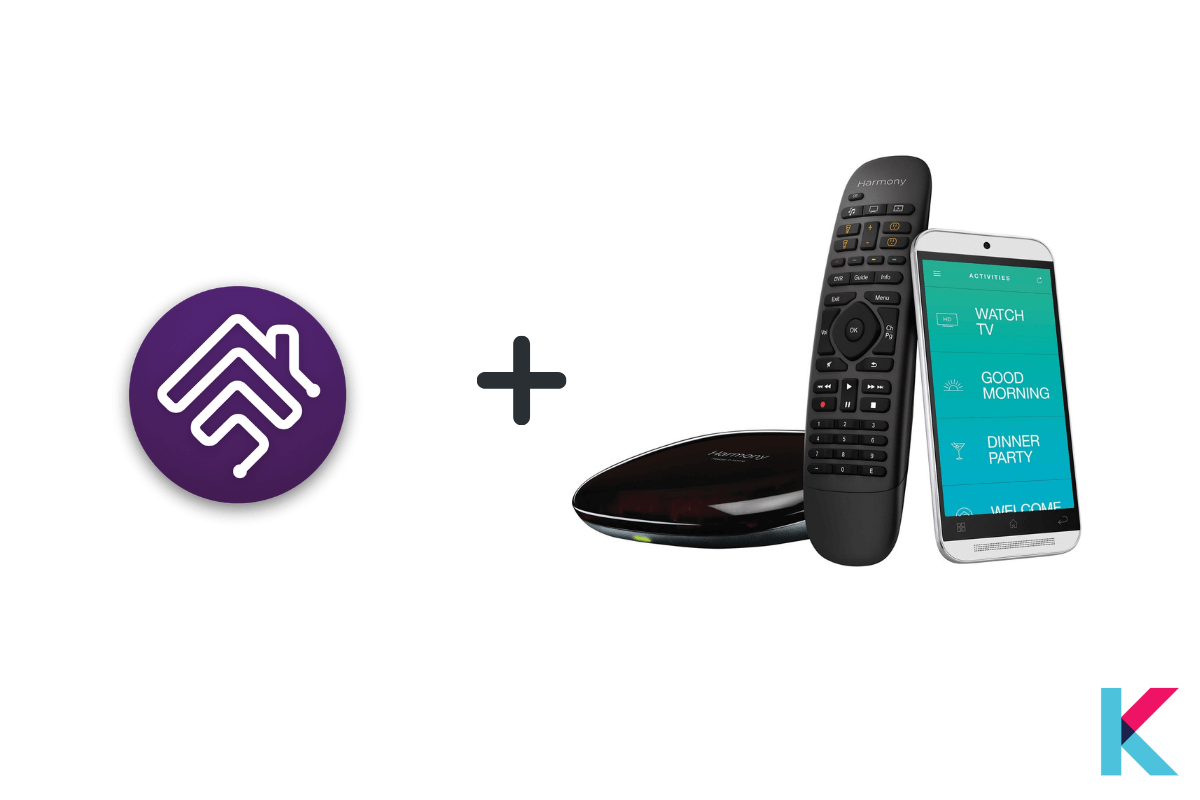
Logitech Harmony Hub
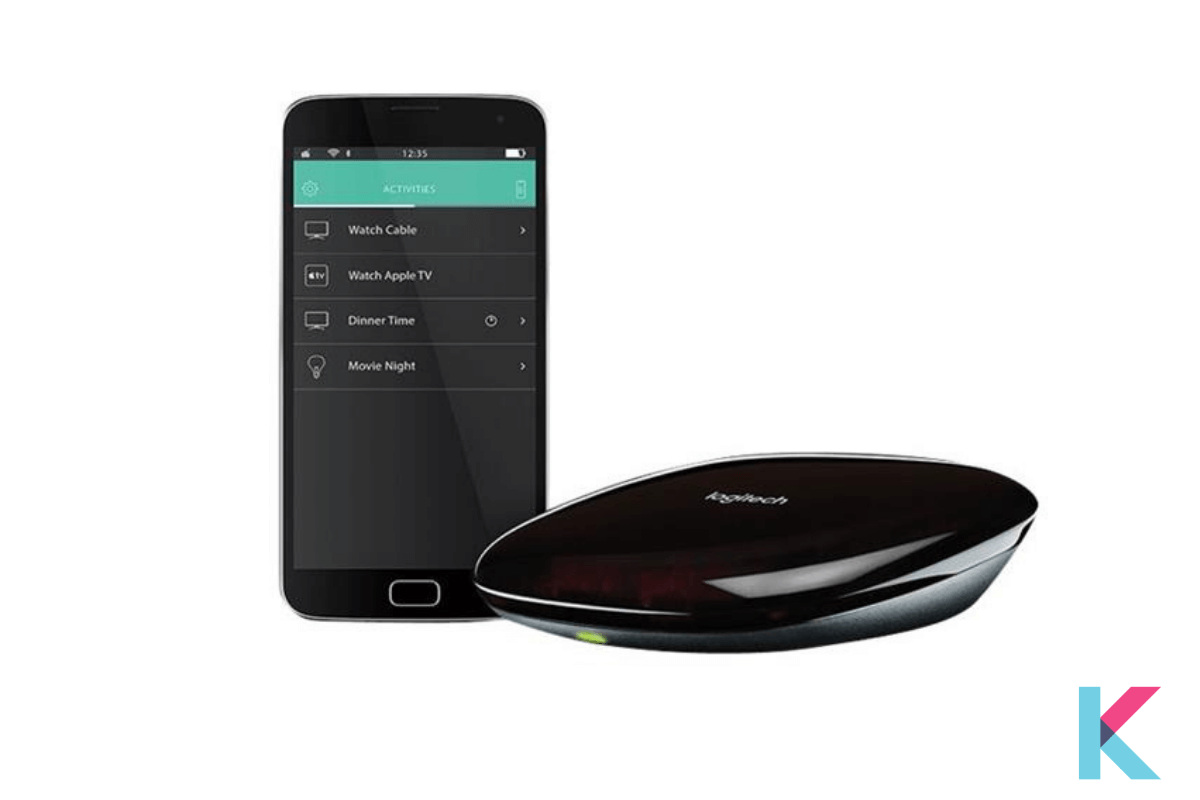
Logitech Harmony Hub is a small hub with eight remotes. You can control your television, fans, sound system, and Sonos speaker using this hub. It also can be worked with Amazon Alexa. You can be able to control the Harmony Hub with your voice, a Home app for iOS using Siri when paired with Homebridge. This plugin converts Harmony Hub activities into HomeKit-enabled switches.
Get Logitech Harmony Hub from Amazon for $154.95.


Kasa Smart Wi-Fi Plug Mini
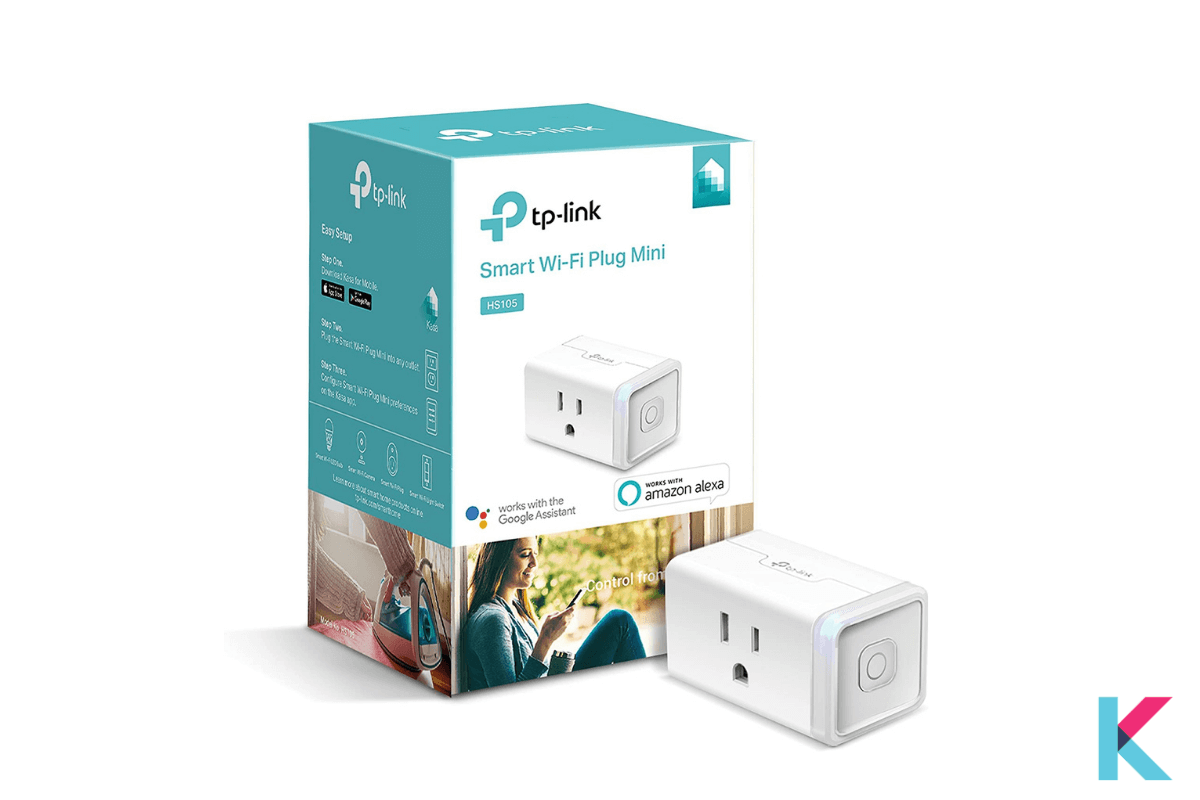
Kasa Smart Wi-Fi Plug Mini is plug from TP-link with a compact and reliable design. It is the cheapest device. It also worked with Google Assistant and Amazon Alexa. This can easily be linked with Homebridge. Also, you can able to toggle the power for TP-link’s smart plugs when paired with Homebridge.

Nest product

Due to a lack of support for HomeKit, Nest products are a little bit infamous among HomeKit enthusiasts. But using the Homebridge plugin, you can easily plugin your Nest Thermostat, Nest protects smoke, and cameras using this.
WeMo product
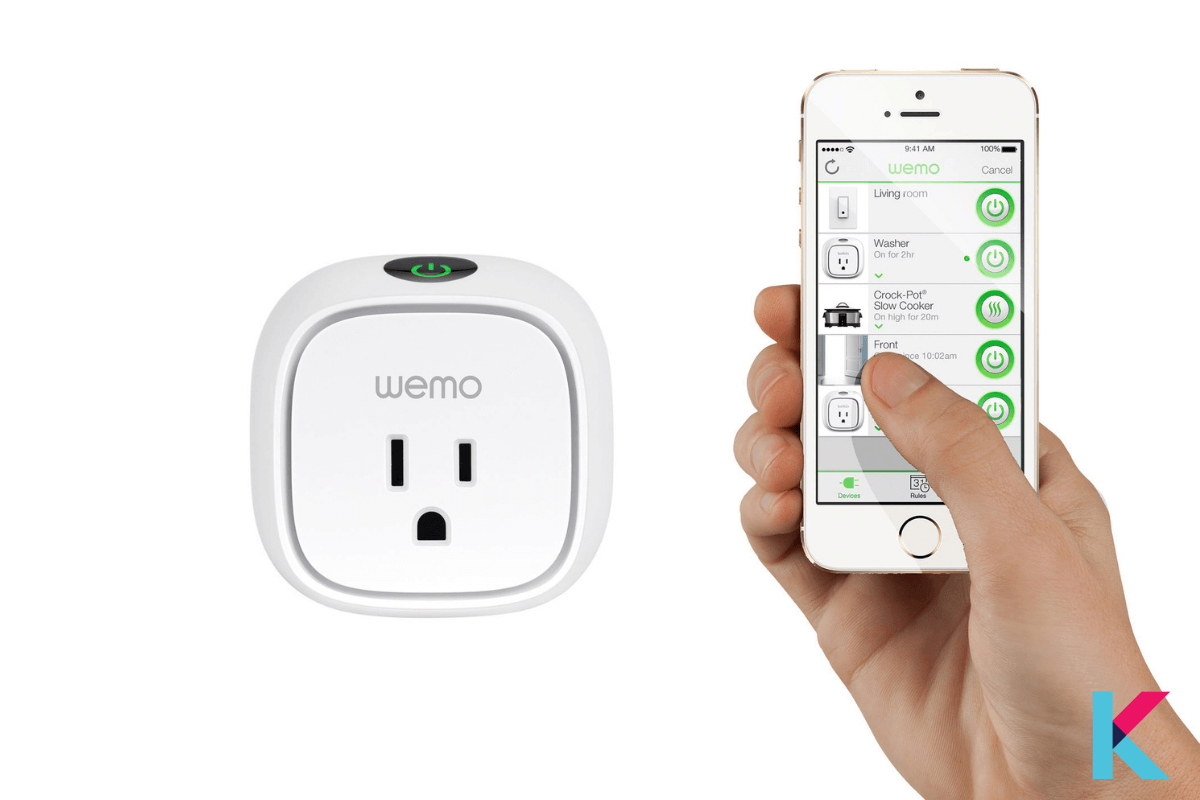
You can now buy WeMo Bridge to add HomeKit support to your WeMo gadgets. You can use this freely available Homebridge to do this. Many WeMo accessories can load using this plugin for Wemo such as the Wemo switch, Wemo bulb, and Wemo dimmer.
Get Smart Outlet for Apple HomeKit from Amazon now

myQ Devices
You can control all your myQ-enabled garage door opener or gate operator through Apple's HomeKit system. You can use Siri and the Home app to open and close your garage door or gate, as well as monitor its status.
Alexa Devices
Alexa devices are not natively compatible with Apple HomeKit. Using Homebridge, you can connect Alexa devices to Apple HomeKit. Amazon Echo HomeKit is the best integration using Homebridge.
You can get Amazon Echo from Amazon from below button.

Final Verdict
In this article, you were able to learn more about Homebridge. Don't worry anymore. You can easily control your smart home devices that don't support HomeKit using Homebridge.
Configuring a user name and password, adding devices, and connecting the computer to HomeKit are all covered by the wizard. So you can make it run on Wi-Fi after you have set it up. Also, you can easily connect your Homebridge to your iPhone.
FAQs related to Homebridge
1 Which computer should we run Homebridge?
Homebridge supports Windows, Linux, and Raspberry Pi. It needs to be turned on all the time to work, so Raspberry Pi is often a good choice due to its low power consumption.
If you don't have a Raspberry Pi, you can download and install the newest version of Node.js and run Homebridge on various types of computers.
2 Is there another Homebridge App?
Yes, there are several apps available for controlling smart home devices, such as the Apple Home App and Eve for HomeKit. These apps can work with Homebridge to enhance your smart home experience.
3 Is Homebridge free?
Yes, Homebridge is free and open-source software.
4 Will Matter replace Homebridge?
No, Matter is not a replacement for Homebridge. While Matter may support some devices, Homebridge offers flexibility and compatibility with a wide range of devices and services.
5 Is HomeBridge worth it?
Yes, HomeBridge is worth it. It extends HomeKit compatibility, allows customization of automations, integrates with other services, and can save money by connecting existing devices.
6 Why use HomeBridge?
HomeBridge allows you to extend HomeKit compatibility, customize automations, integrate with other services, and save money by connecting existing devices instead of purchasing new HomeKit-compatible ones.